
Invoke AI is all about helping creative professionals by making advanced AI tools simple to use. Their platform lets people in industries like entertainment, architecture, and product design create amazing visuals faster and more easily. What makes InvokeAI special is that it’s secure and scalable, meaning it can handle both small and large projects while keeping everything you create safe. Plus, you have full control over your work, so nothing gets shared without your permission. This makes InvokeAI perfect for creative teams who need reliable and powerful tools to bring their ideas to life.
What is InvokeAI?
InvokeAI is a generative AI platform designed for creating high-quality visual media. It allows users to create visual media by using AI-powered tools that are efficient, secure, and customizable.
A Powerful Tool for Visual Media Creation
InvokeAI is used by professionals in industries like entertainment, architecture, and product design to generate assets quickly. One key feature is its ability to create IP-compliant assets, meaning any visuals generated through the platform fully belong to the user. This makes it a great choice for studios and companies that need original content without worrying about intellectual property rights.
Full Ownership and Customizable Workflows
What sets Invoke apart is its focus on giving creators full control over their content. It allows users to build workflows that fit their specific needs, making it possible to adjust every detail of the visual output. This customization ensures that the final product matches the creator’s vision exactly, without the restrictions some other AI platforms might impose. Whether it’s a simple project or a large-scale production, Invoke offers precise creative control for its users.
How to Use InvokeAI
Using InvokeAI with MimicPC is simple and convenient, especially for those who want a free, cloud-based platform with easy access to their AI-generated content. Follow these steps to get started:
1. Access MimicPC
MimicPC is a free online AI generator platform that includes cloud storage for your projects. Start by logging in to MimicPC to access the tools.

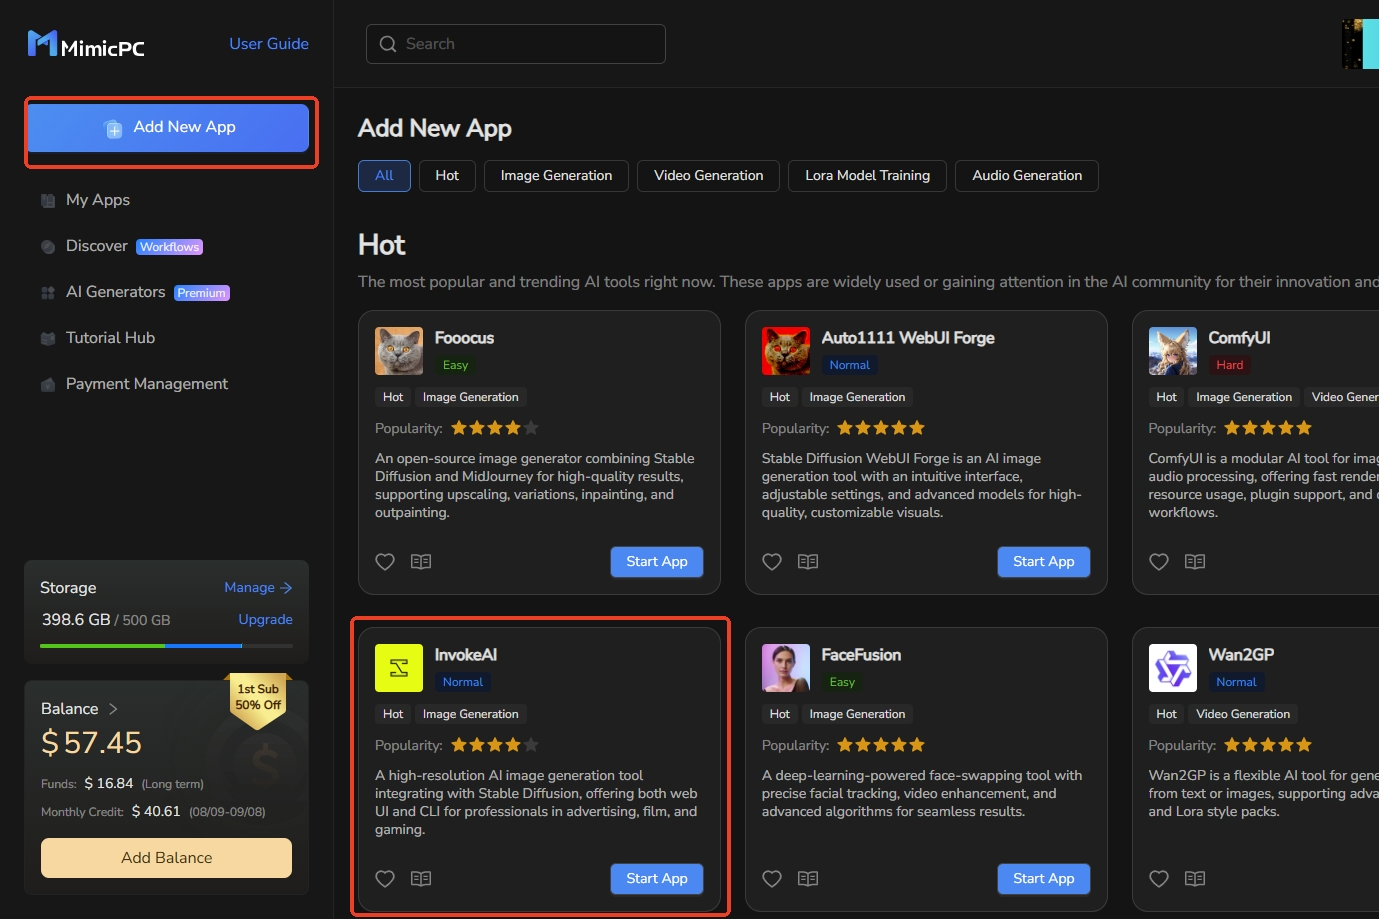
2. Find InvokeAI
Once logged in, locate InvokeAI in the platform's menu and open it. This will give you access to all the image generation features InvokeAI has to offer.
Generating Your First Image with Invoke
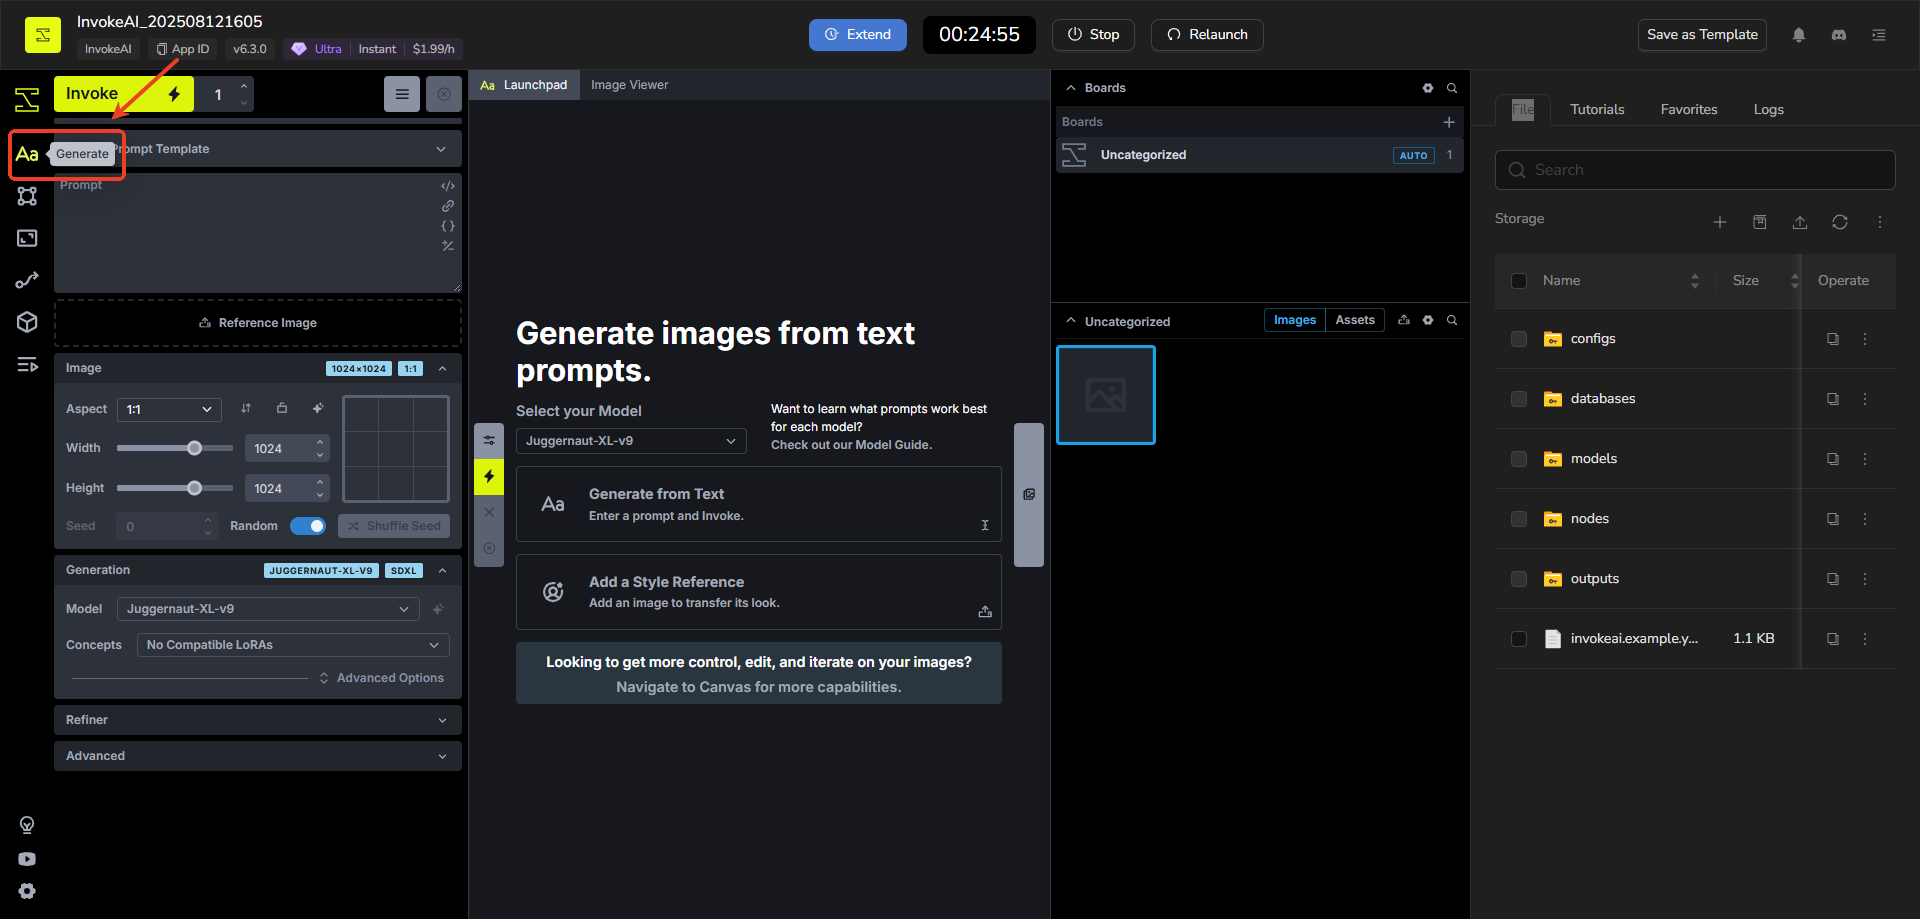
Step 1: Open the Generate Tab
- Launch Invoke and navigate to the Generate tab (it's usually the default or main screen, as shown in the screenshot).
- This tab is the fastest way to turn your text descriptions (prompts) and any references into finished images. You'll see sections for prompts, settings, and a gallery on the right.
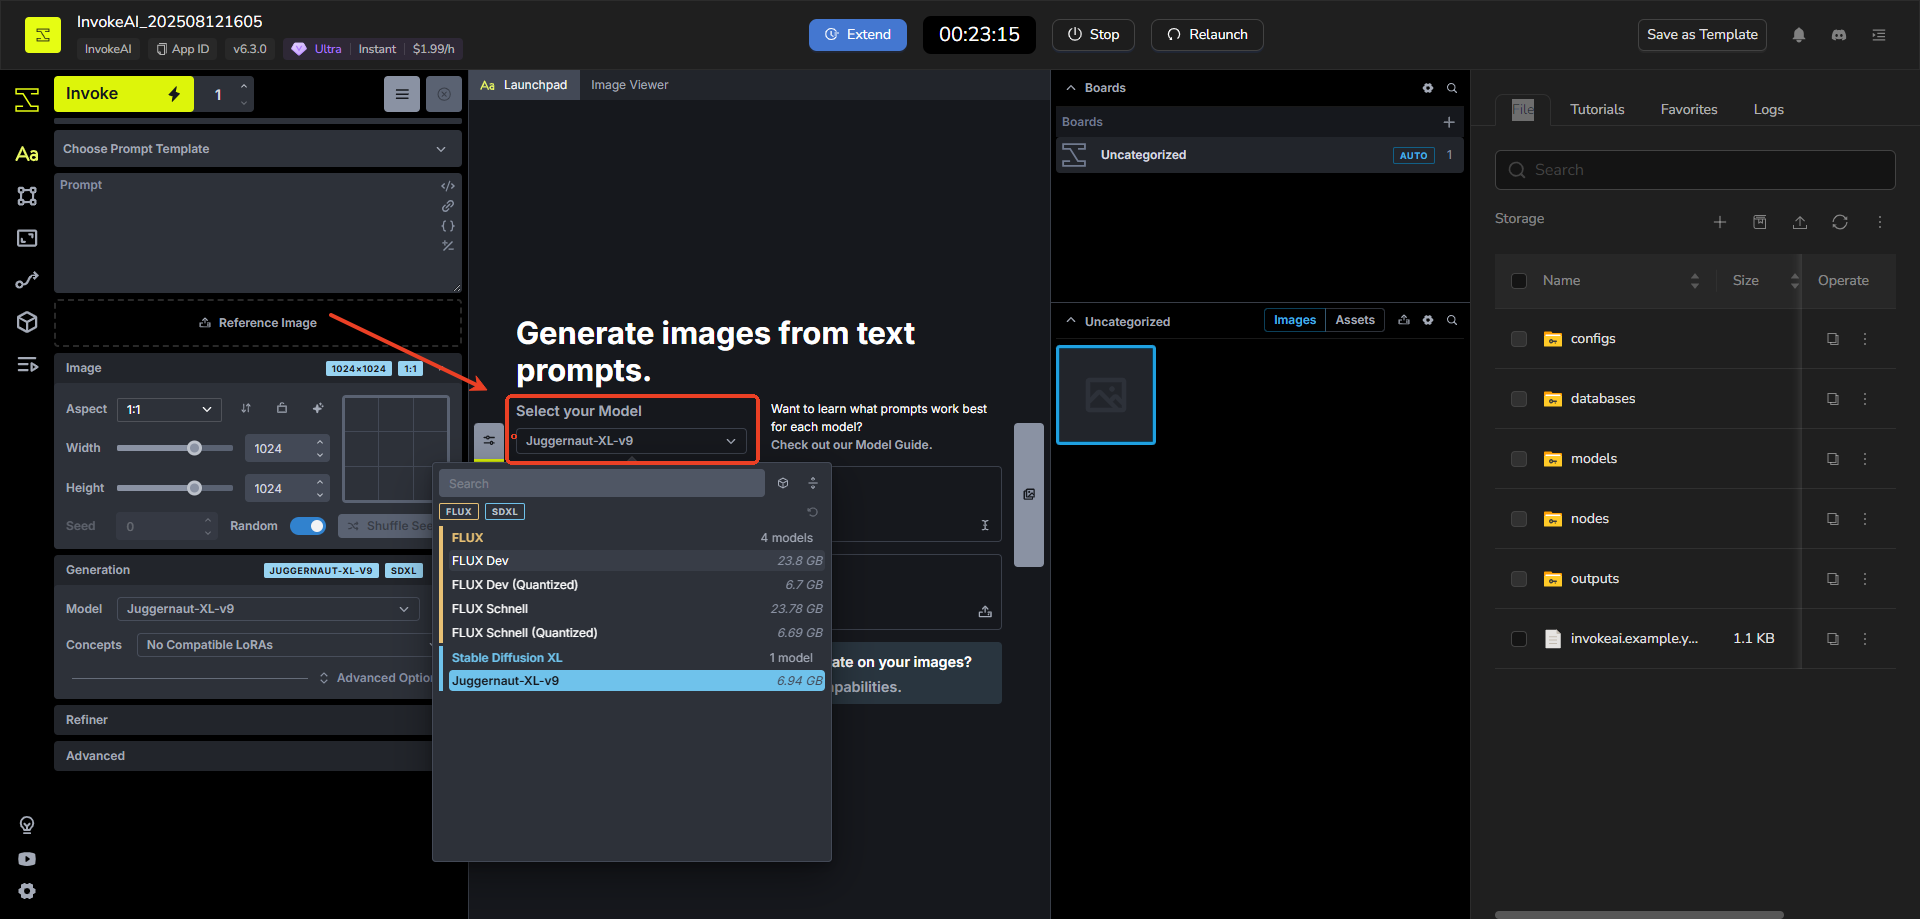
Step 2: Select a Model
- Look for the Model dropdown menu.Choose from the available models.
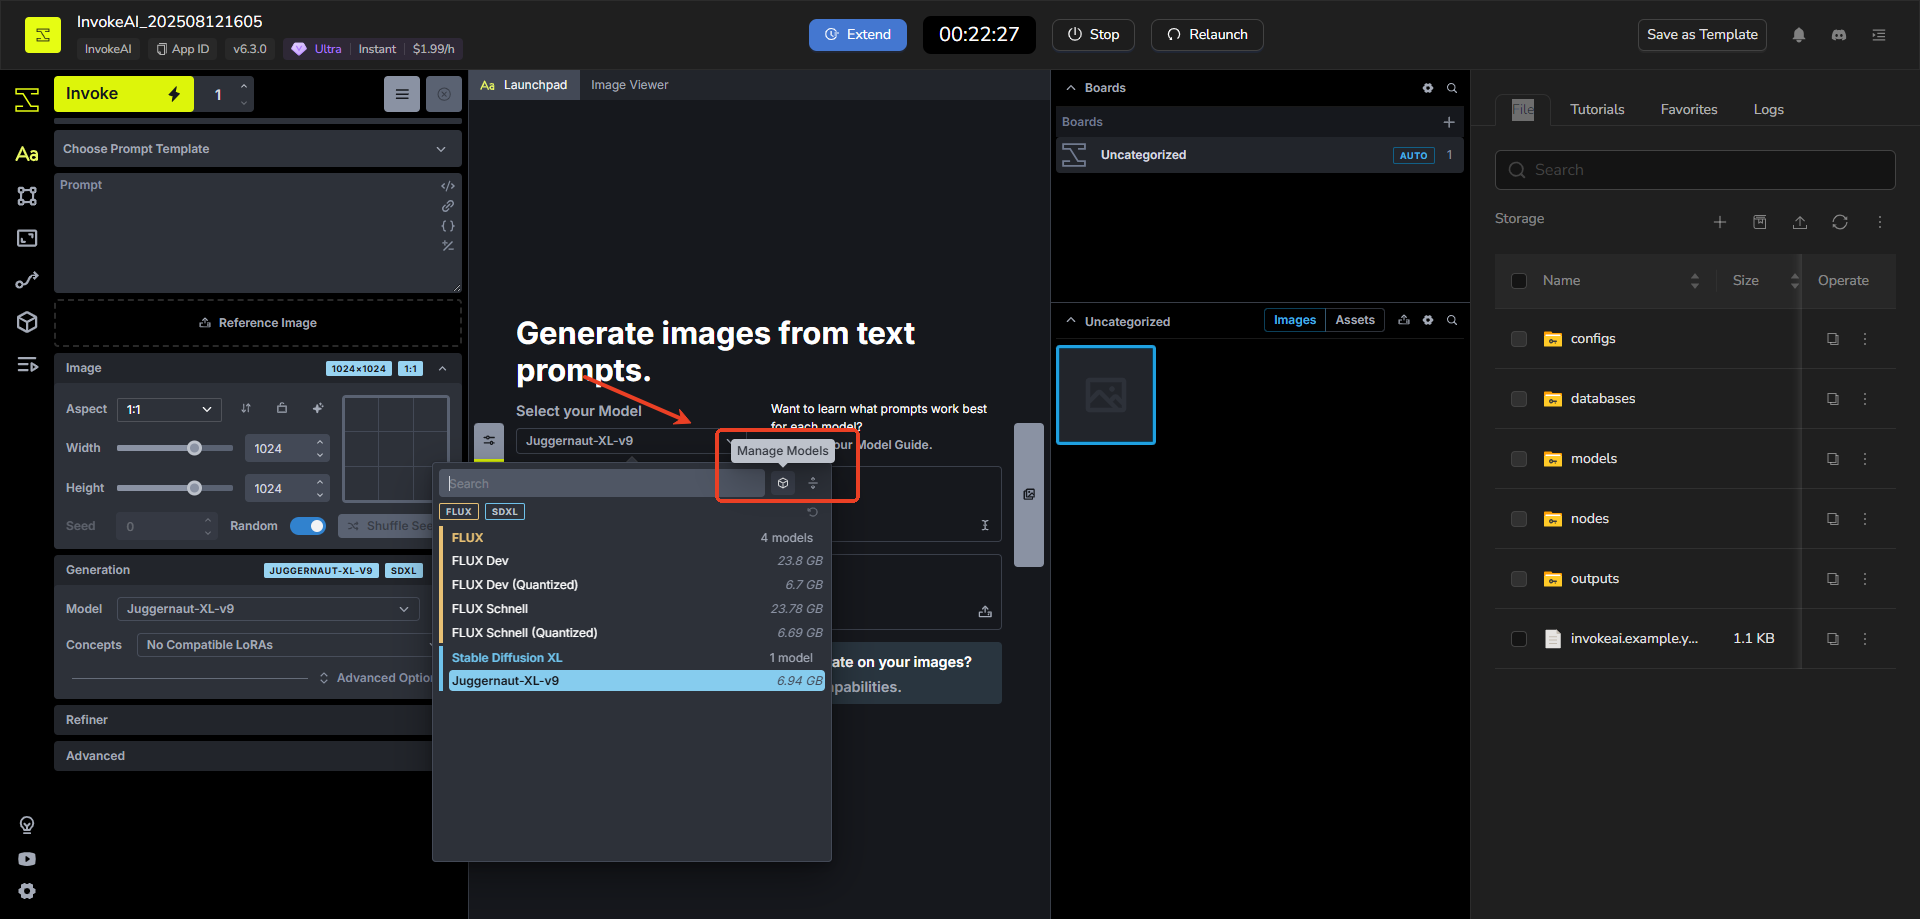
- If you need more, click on the Model Manager to add or download new ones.
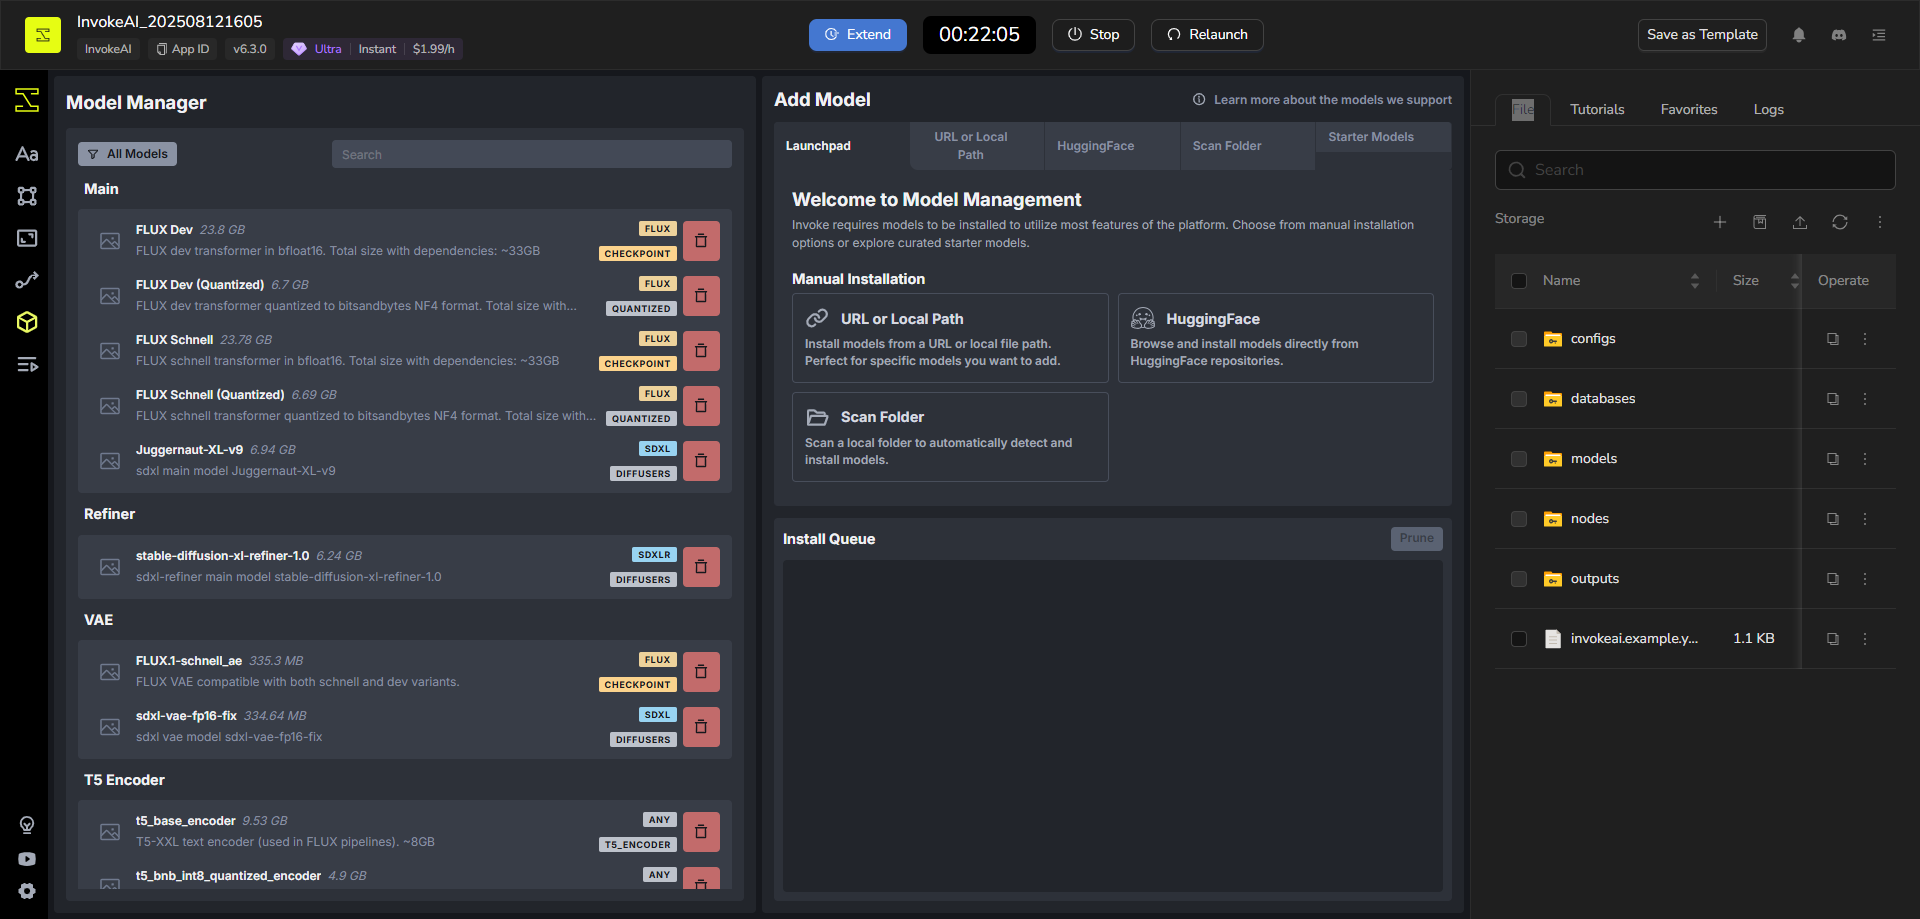
Tip: Different models are great for different tasks (e.g., realistic photos vs. artistic styles). The app automatically adjusts controls when you switch models. For the latest info on what each model does best, check Invoke's official Model Guide.
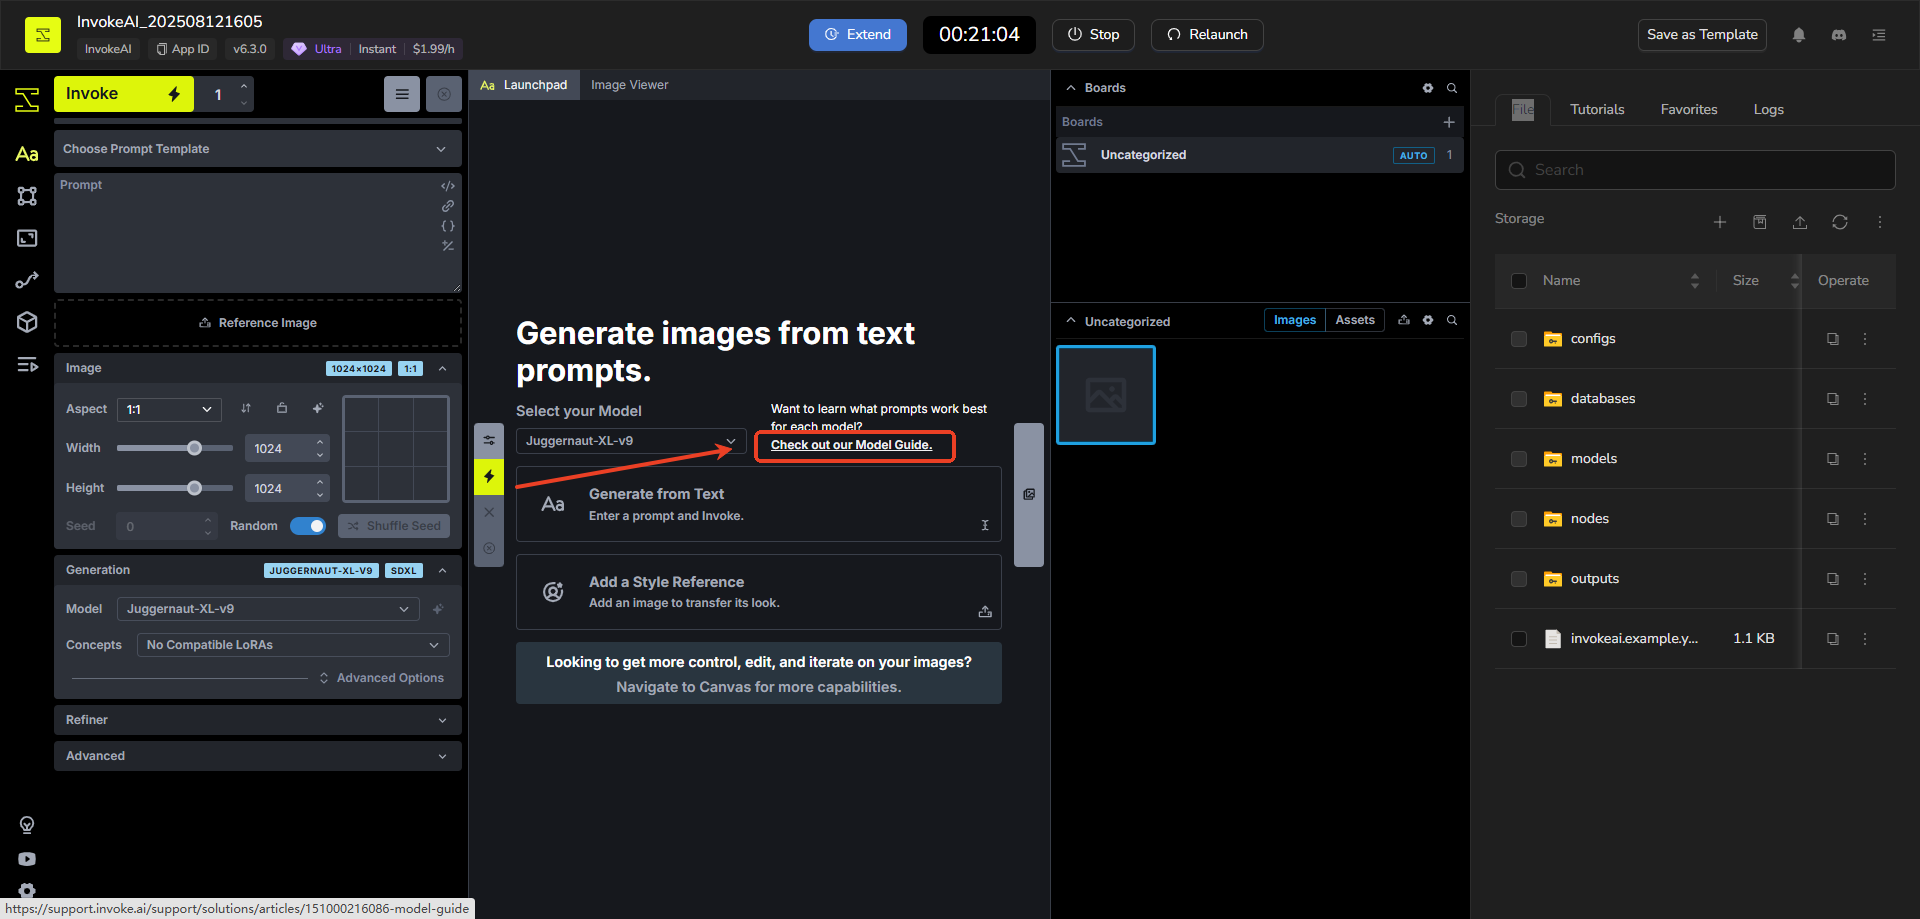
Step 3: Enter Your Prompt
- In the central Prompt area, type a description of the image you want to create.
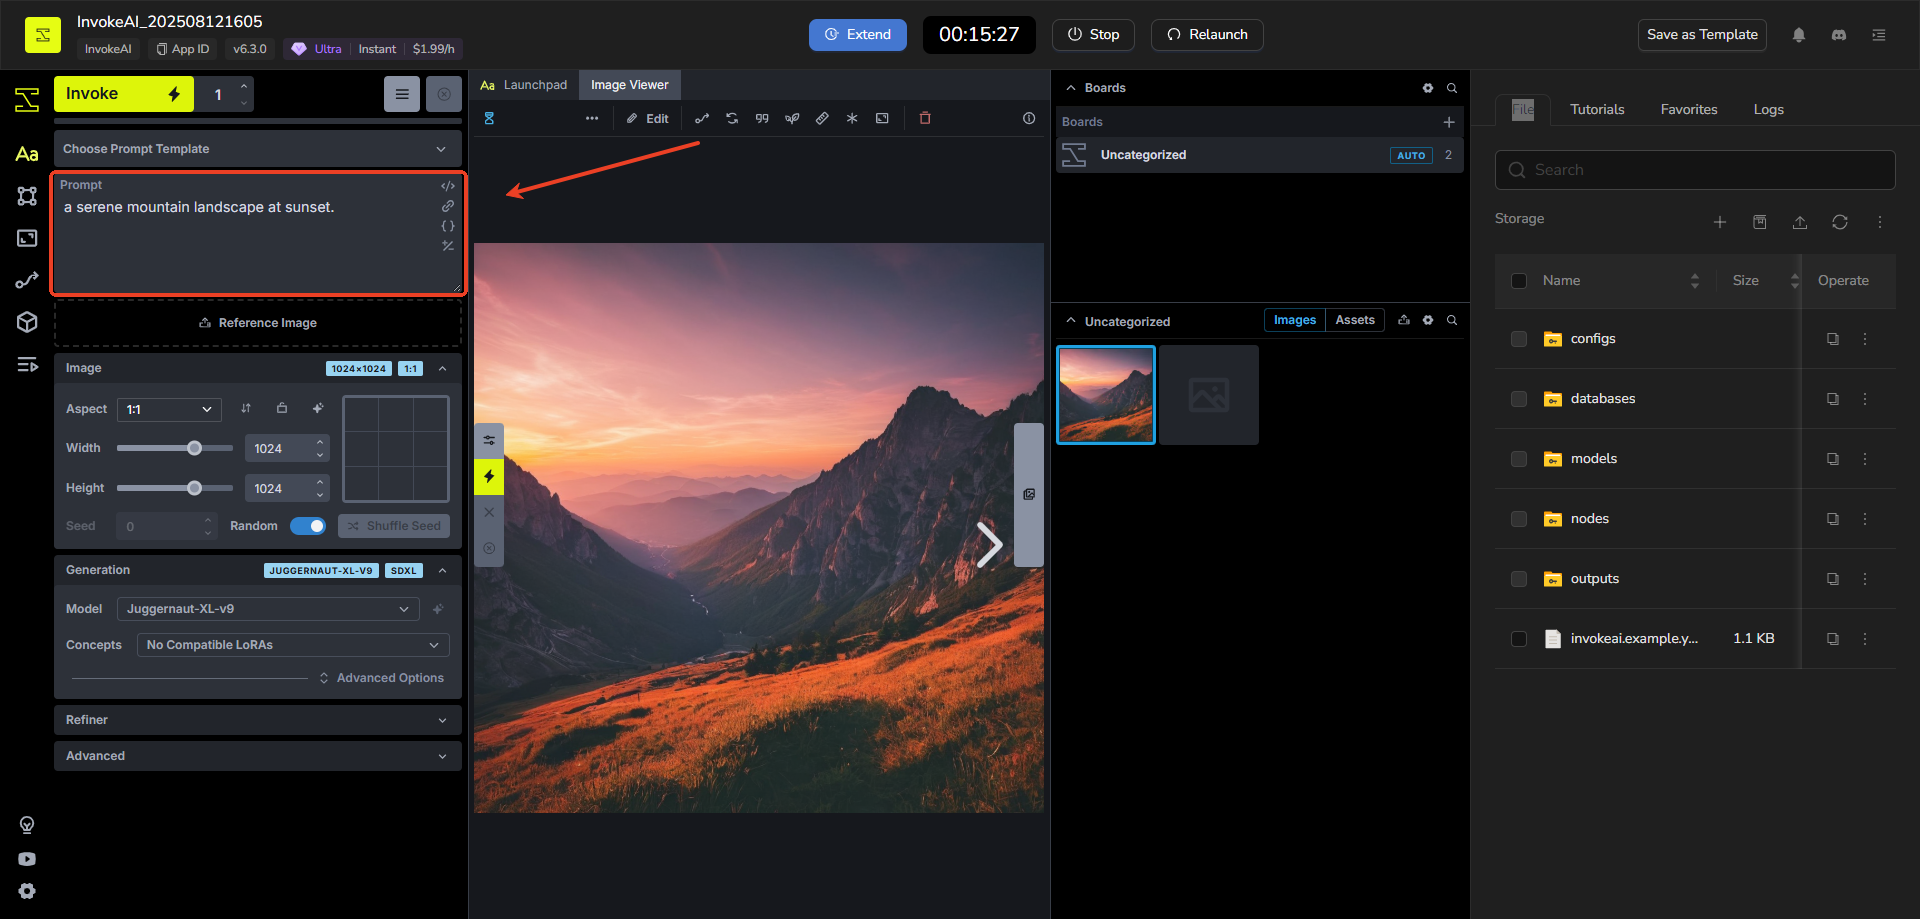
- You can also add and save Prompt Templates. These appear as reusable snippets—click to insert them into your prompt for faster setup.
Step 4: Adjust Key Settings (Essentials for Beginners)
- Aspect Ratio: Set the image shape (e.g., square, landscape).
- Steps: Start with 20-50 (higher means more detail but takes longer).
- Scheduler: Pick one like "Euler" for a good default.
- CFG Scale: Around 7-10 to balance how closely the image follows your prompt.
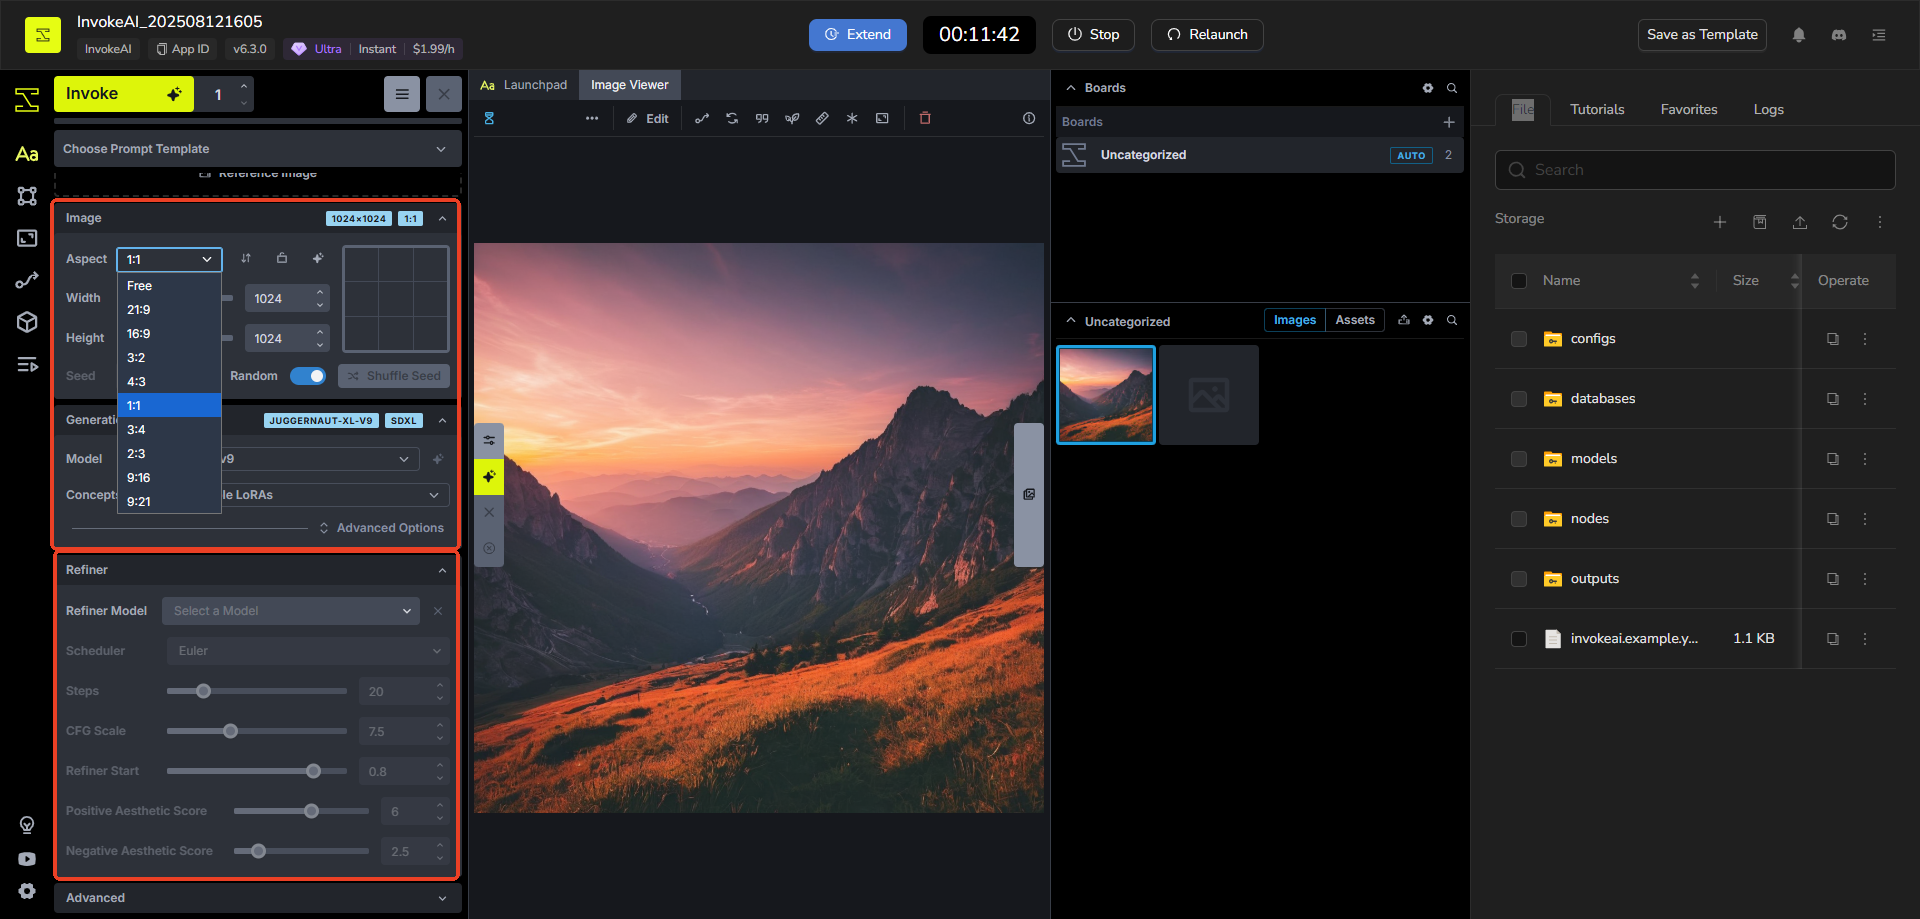
Step 5: Generate the Image
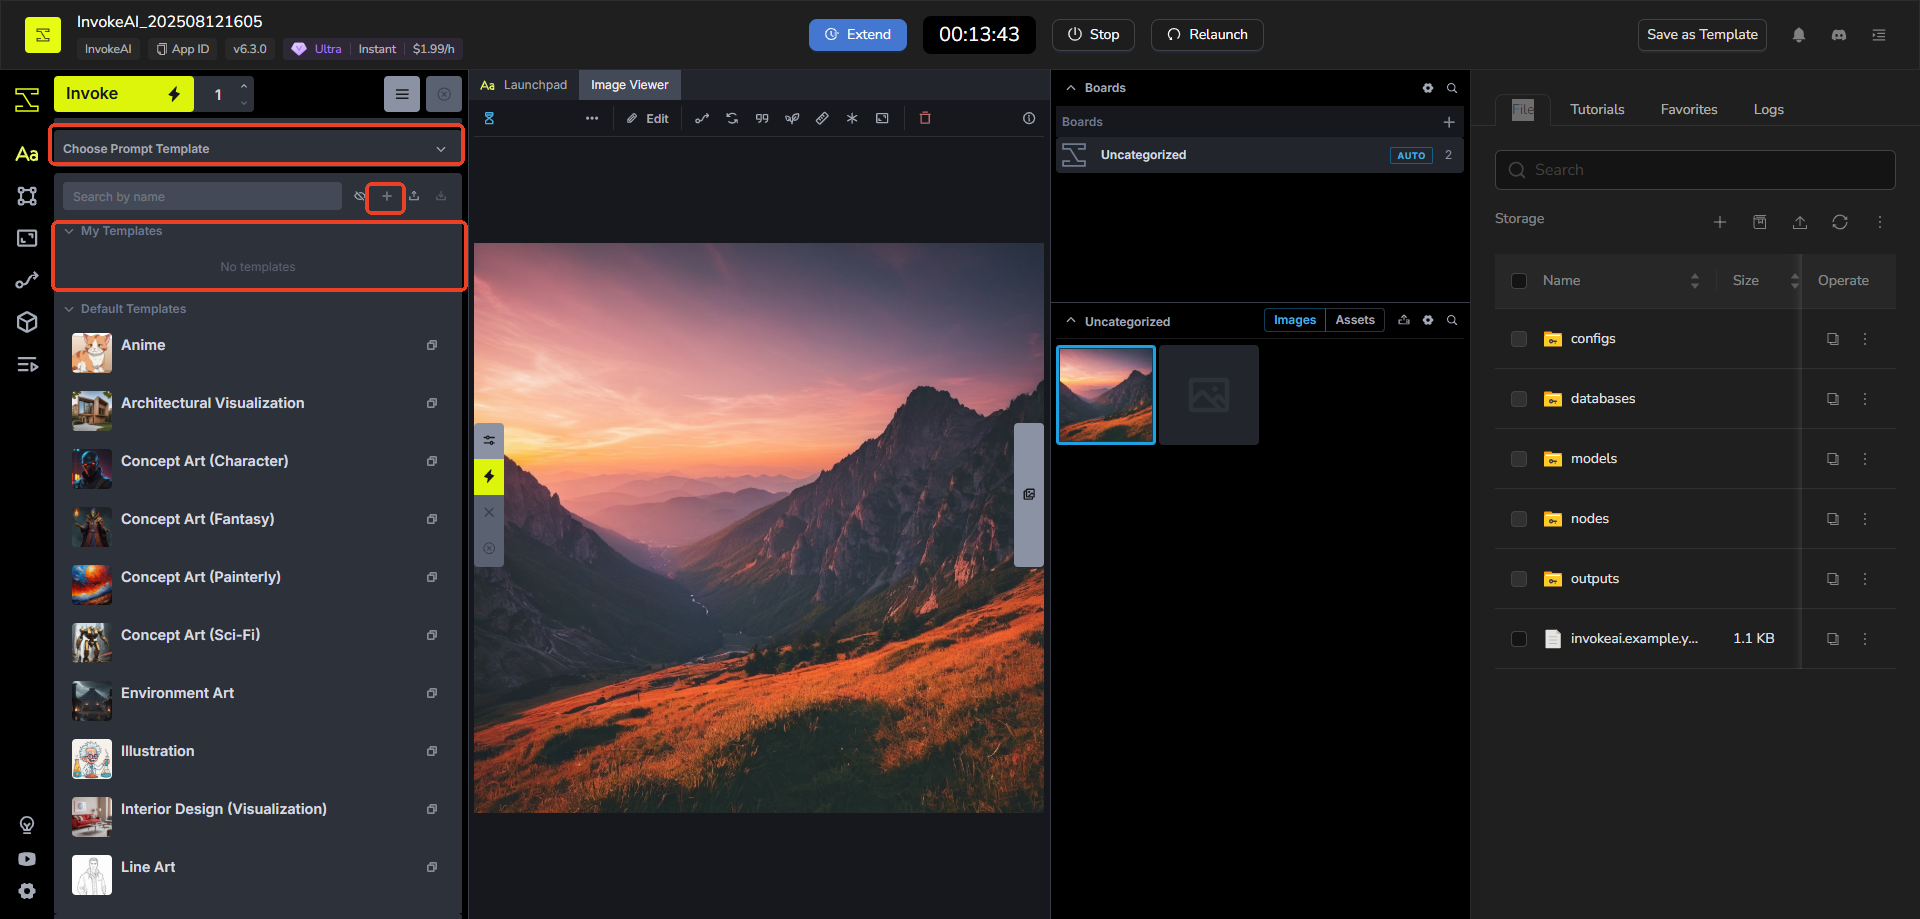
- Once your prompt and settings are ready, click the Invoke or Generate button.Wait a few seconds (or minutes, depending on your setup). The image will generate and automatically appear in your Gallery on the right side.
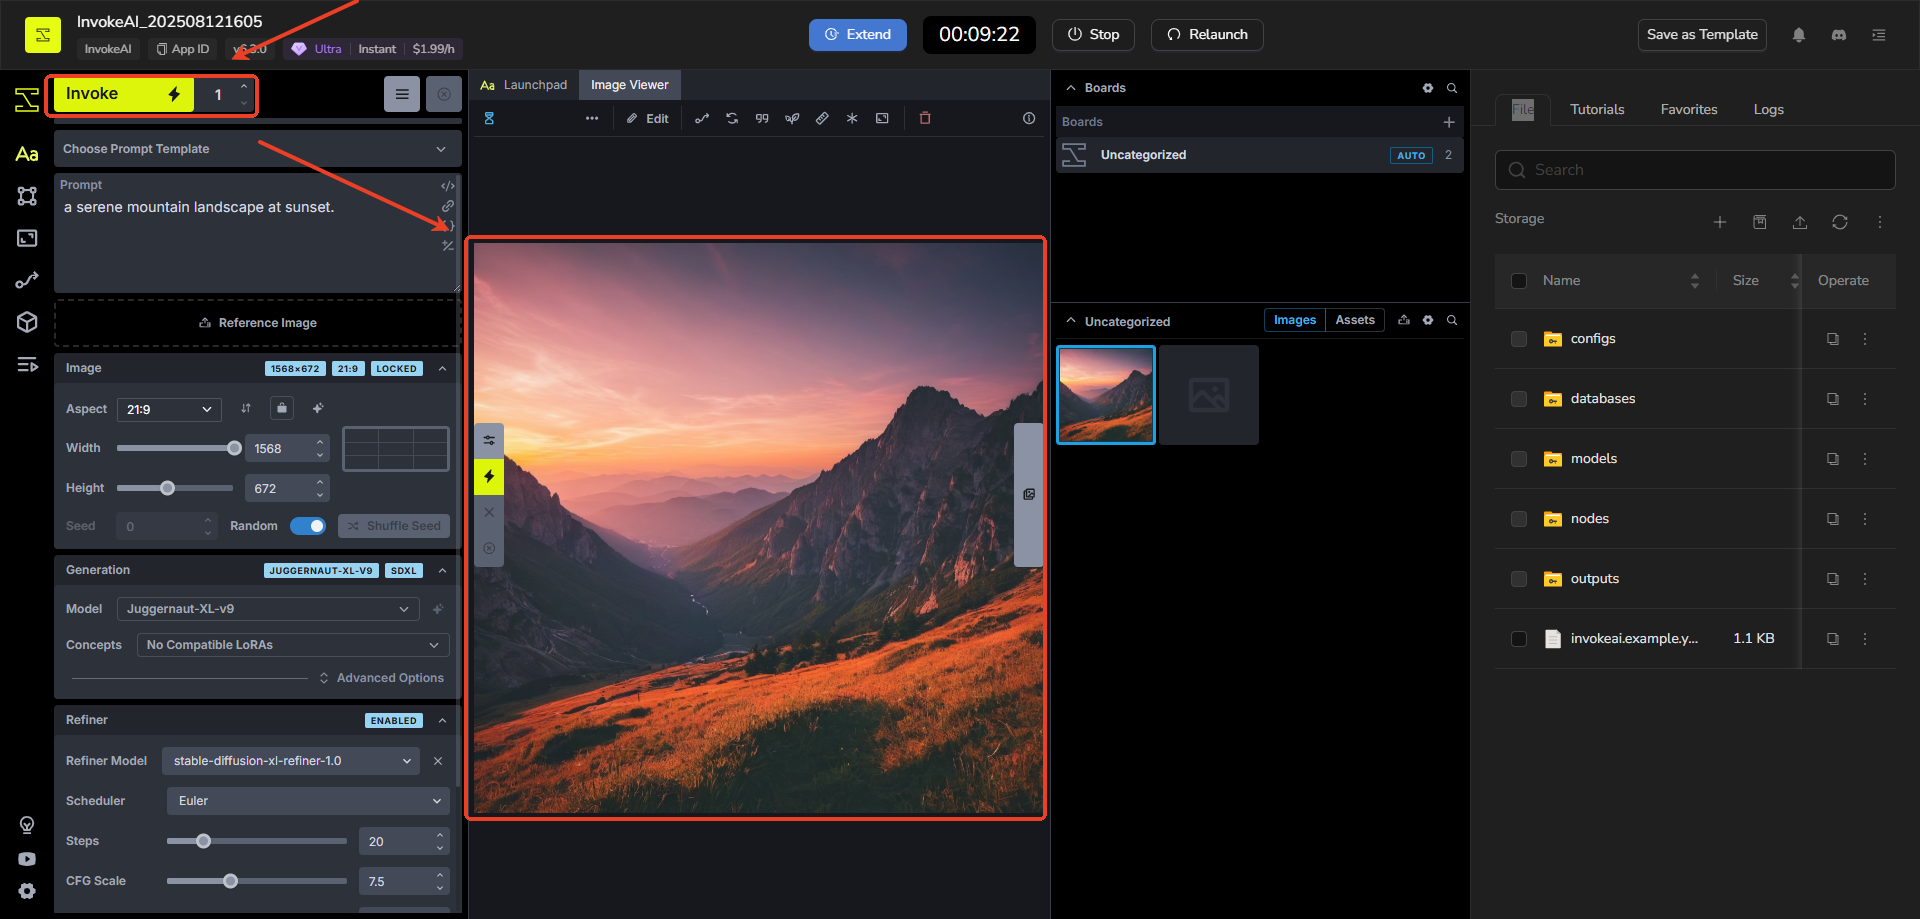
Step 6: View and Organize Your Image
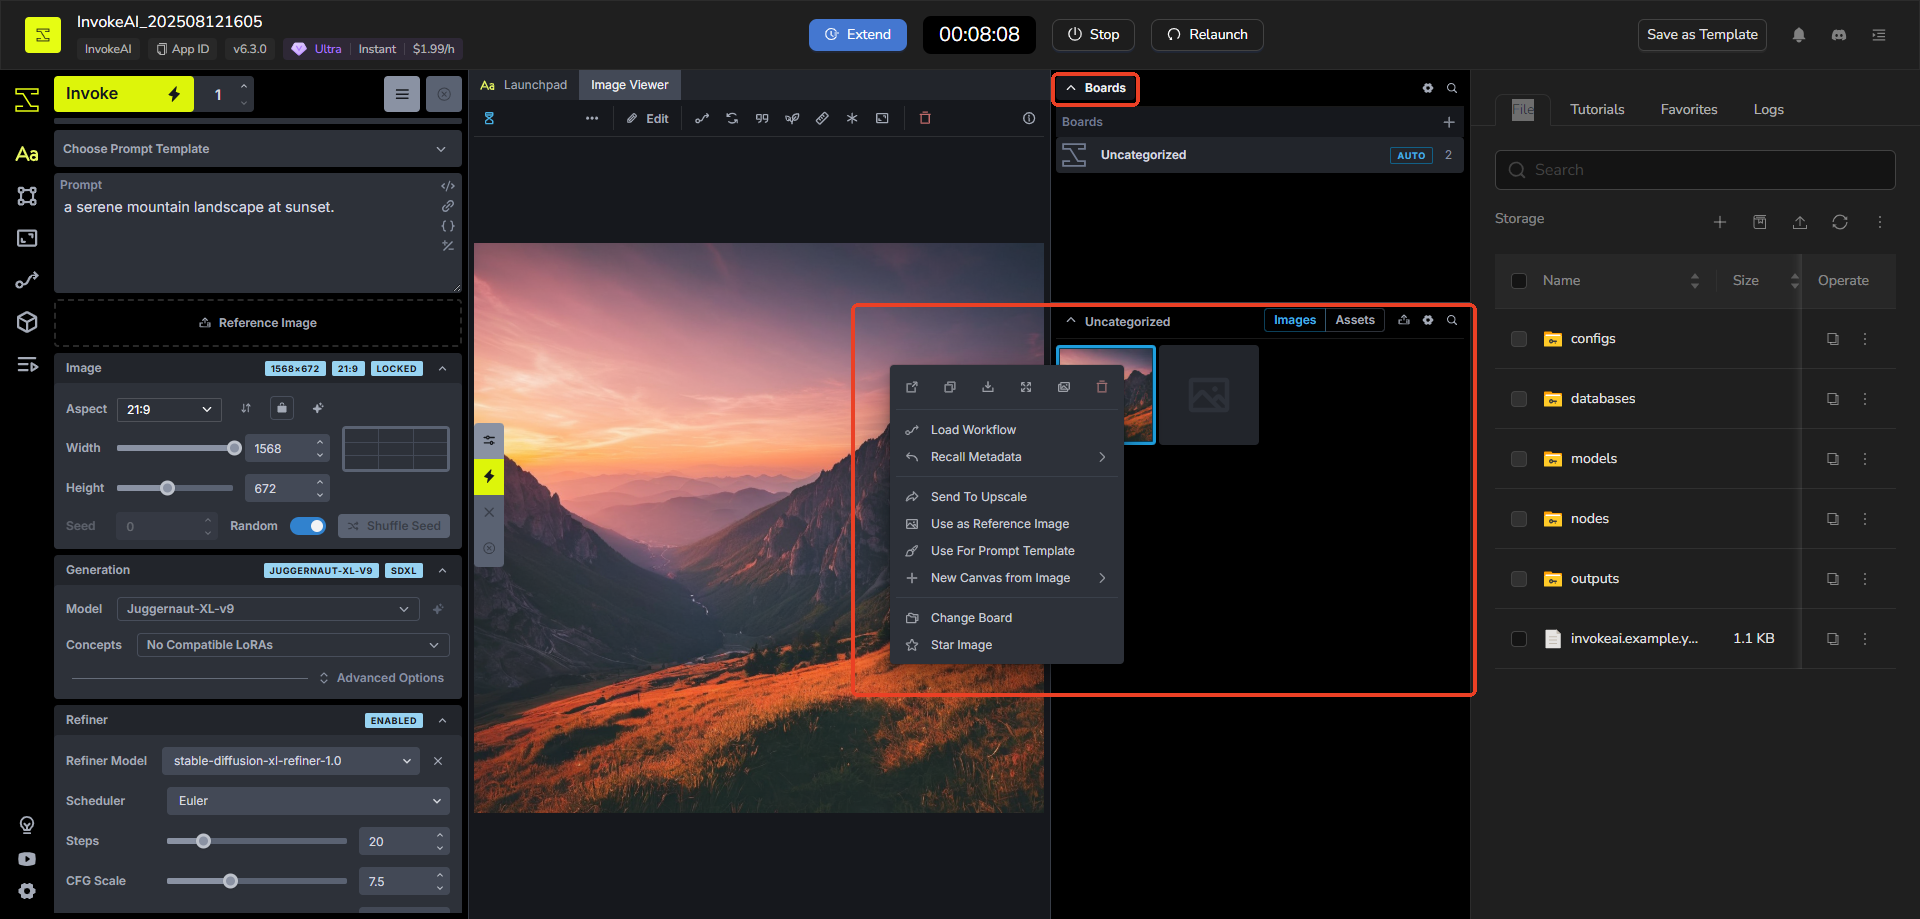
- Your new image will be added to the selected Board in the Gallery (e.g., "Untitled" as in the screenshot).
- Organize it: Add or remove boards using the board management tools, and drag thumbnails between boards to sort them.
- If you like the result, great! If not, tweak your prompt or settings and generate again.
Using InvokeAI's Canvas to Edit and Create Images
Step 1: Open the Canvas Tab
- Launch InvokeAI and switch to the Canvas tab.
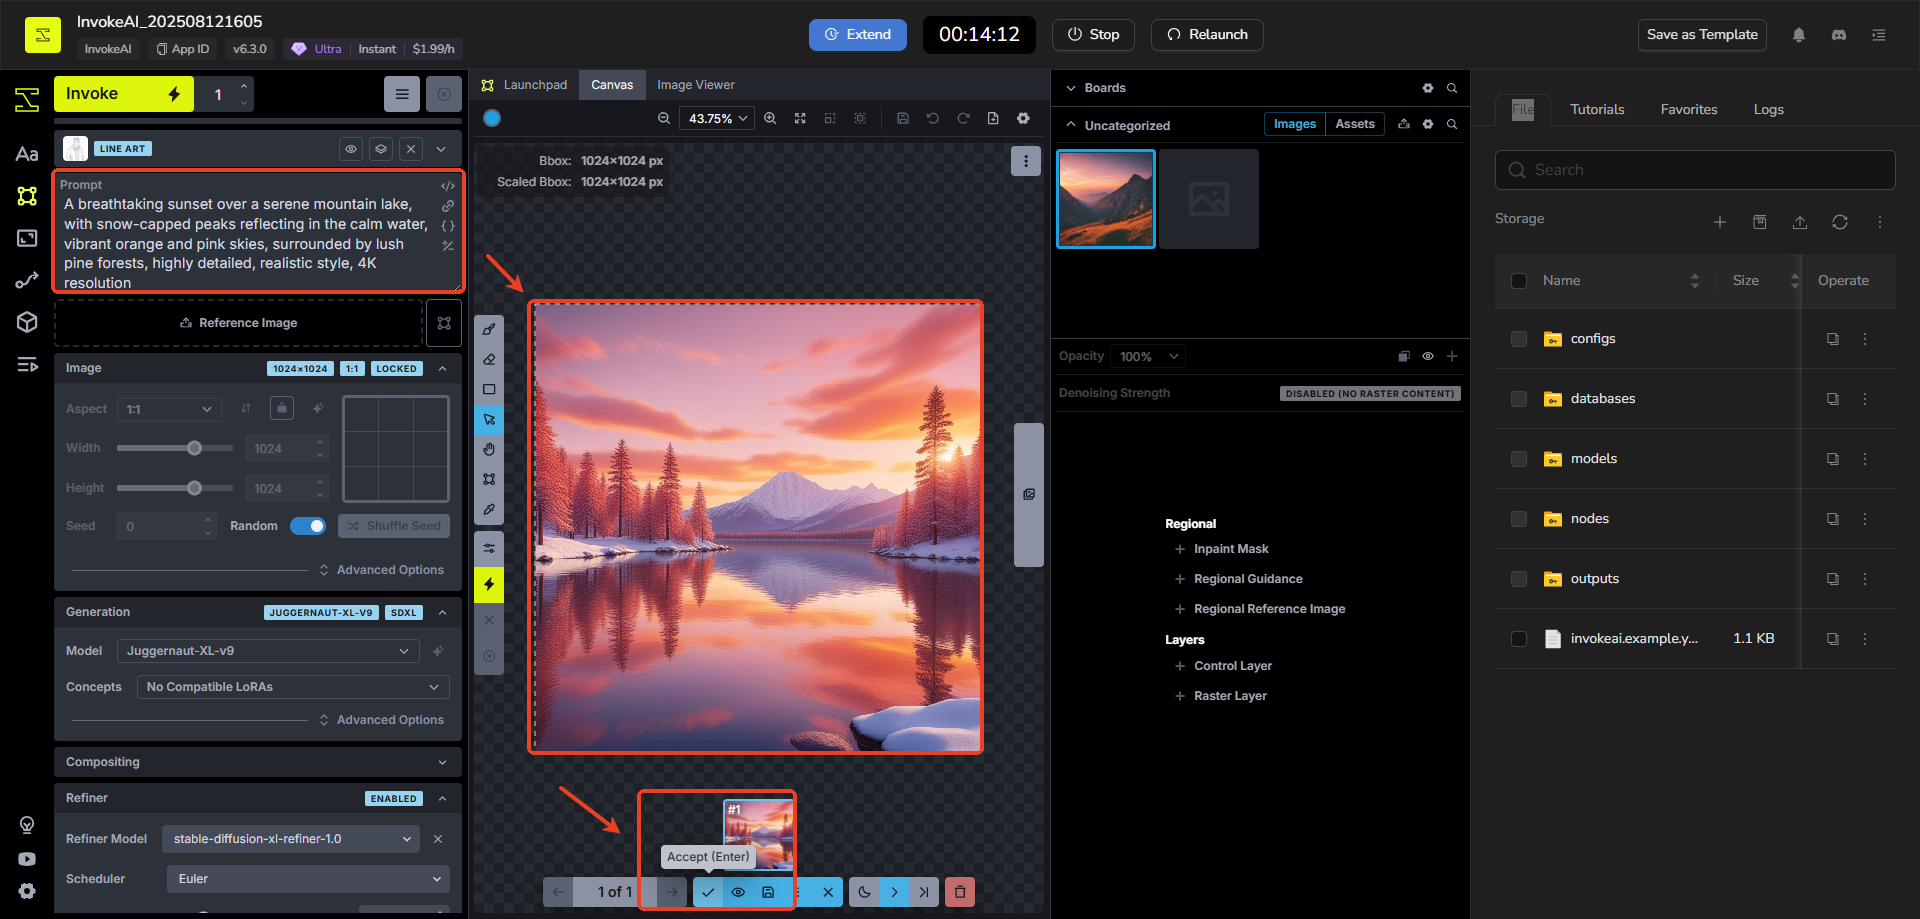
- On a blank canvas, you'll see a dotted outline (bounding box) that matches your aspect ratio from the Image tab. The left panel has tools.The center is the main canva.
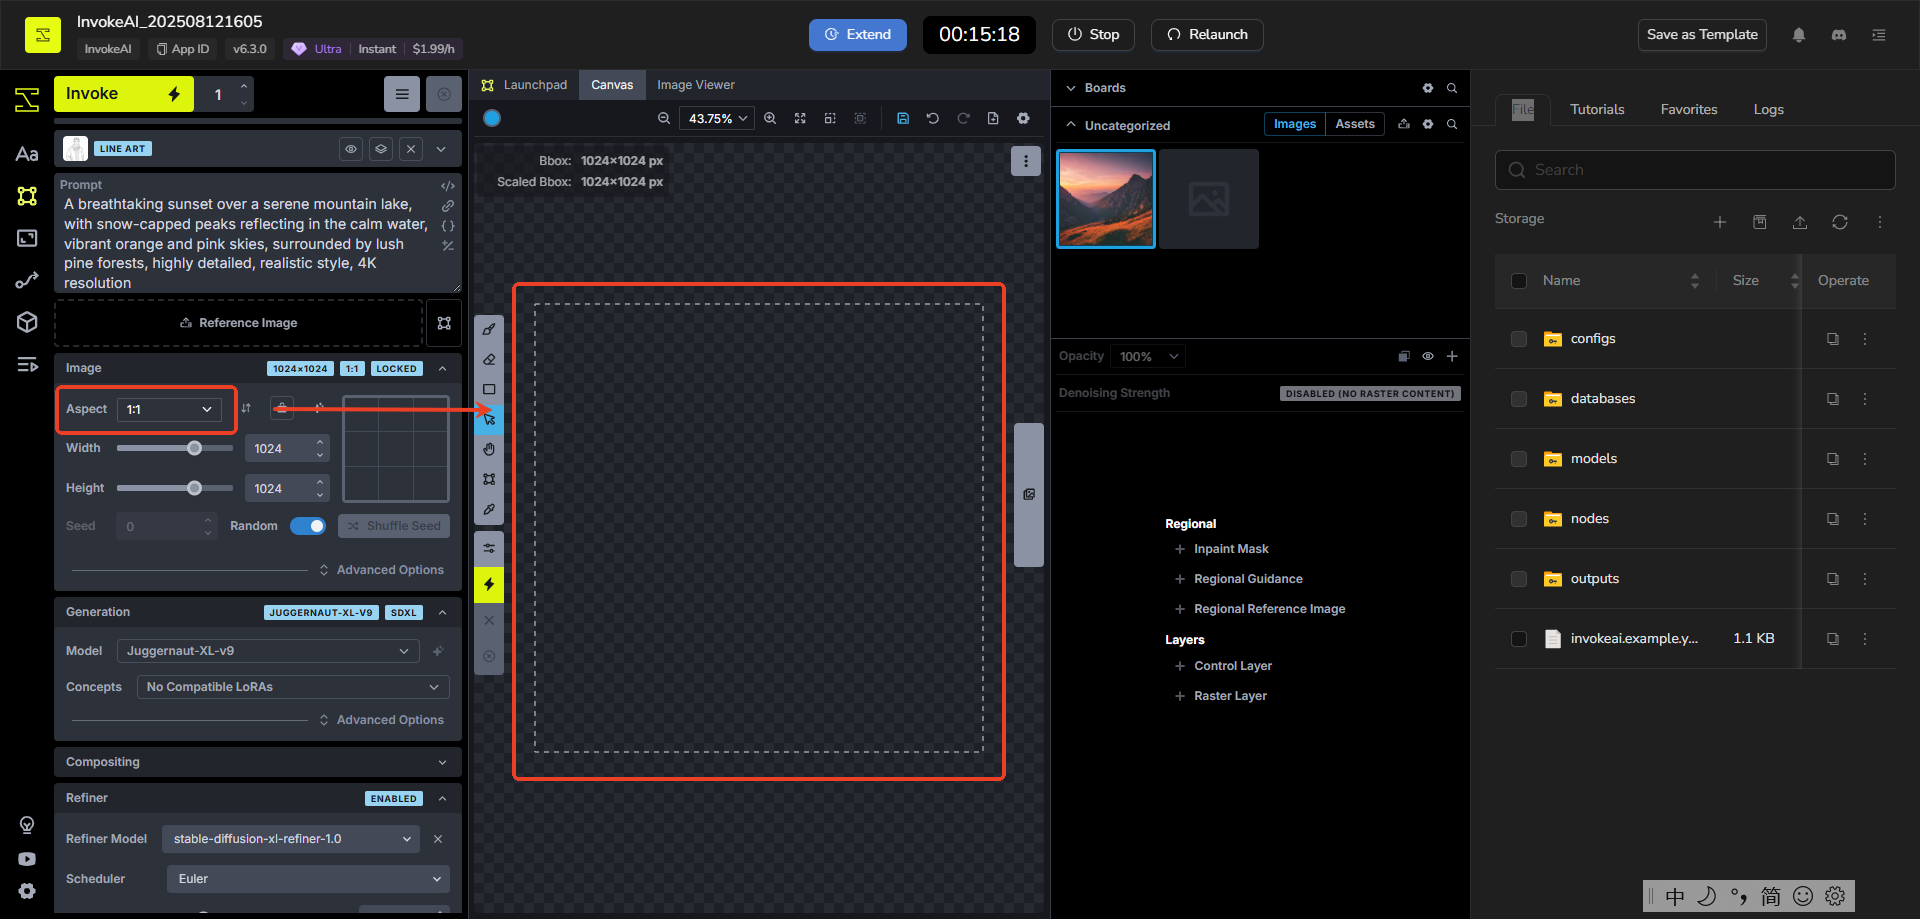
Step 2: Understand Bounding Box and Basic Generation
- The bounding box is the dotted frame on the canvas—it sets where new content generates.
- Enter a prompt in the left Prompt area, then click Invoke.
- Invoke fills empty space inside the box using your prompt and layers, leaving the rest unchanged.
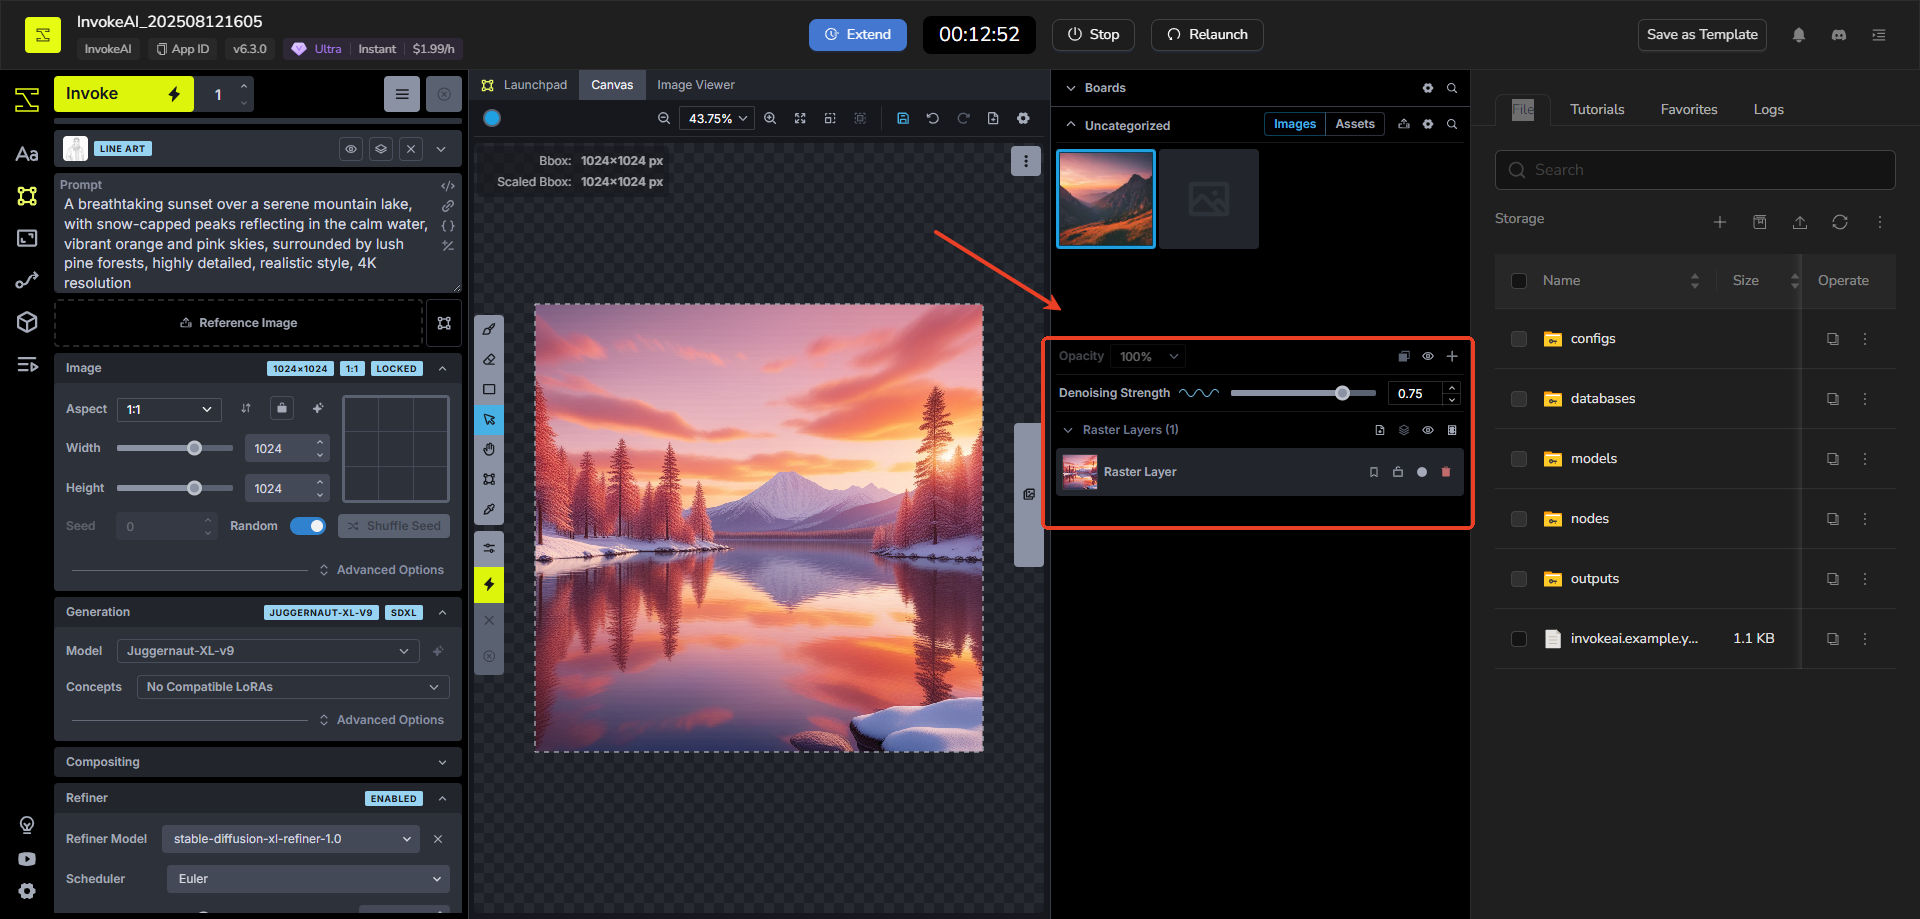
- Click Accept to add it as a Raster Layer in the left Layers tab.
Step 3: Expand and Outpaint (For Models Like Flux or SDXL)
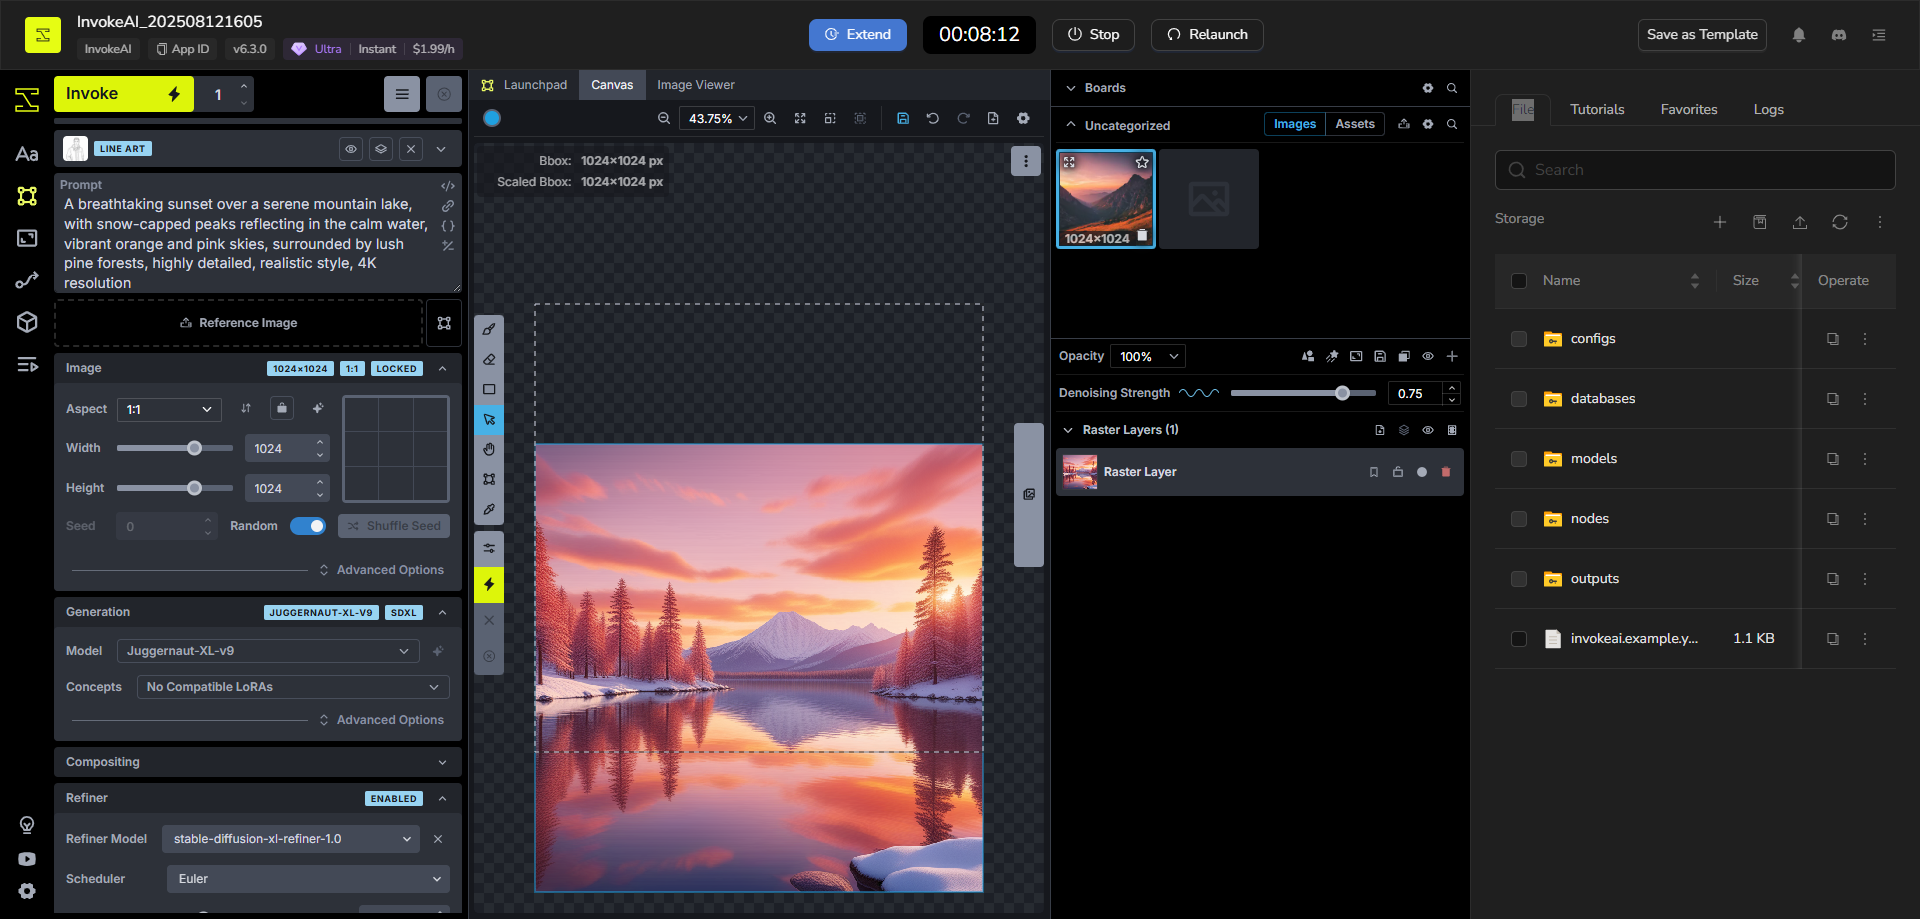
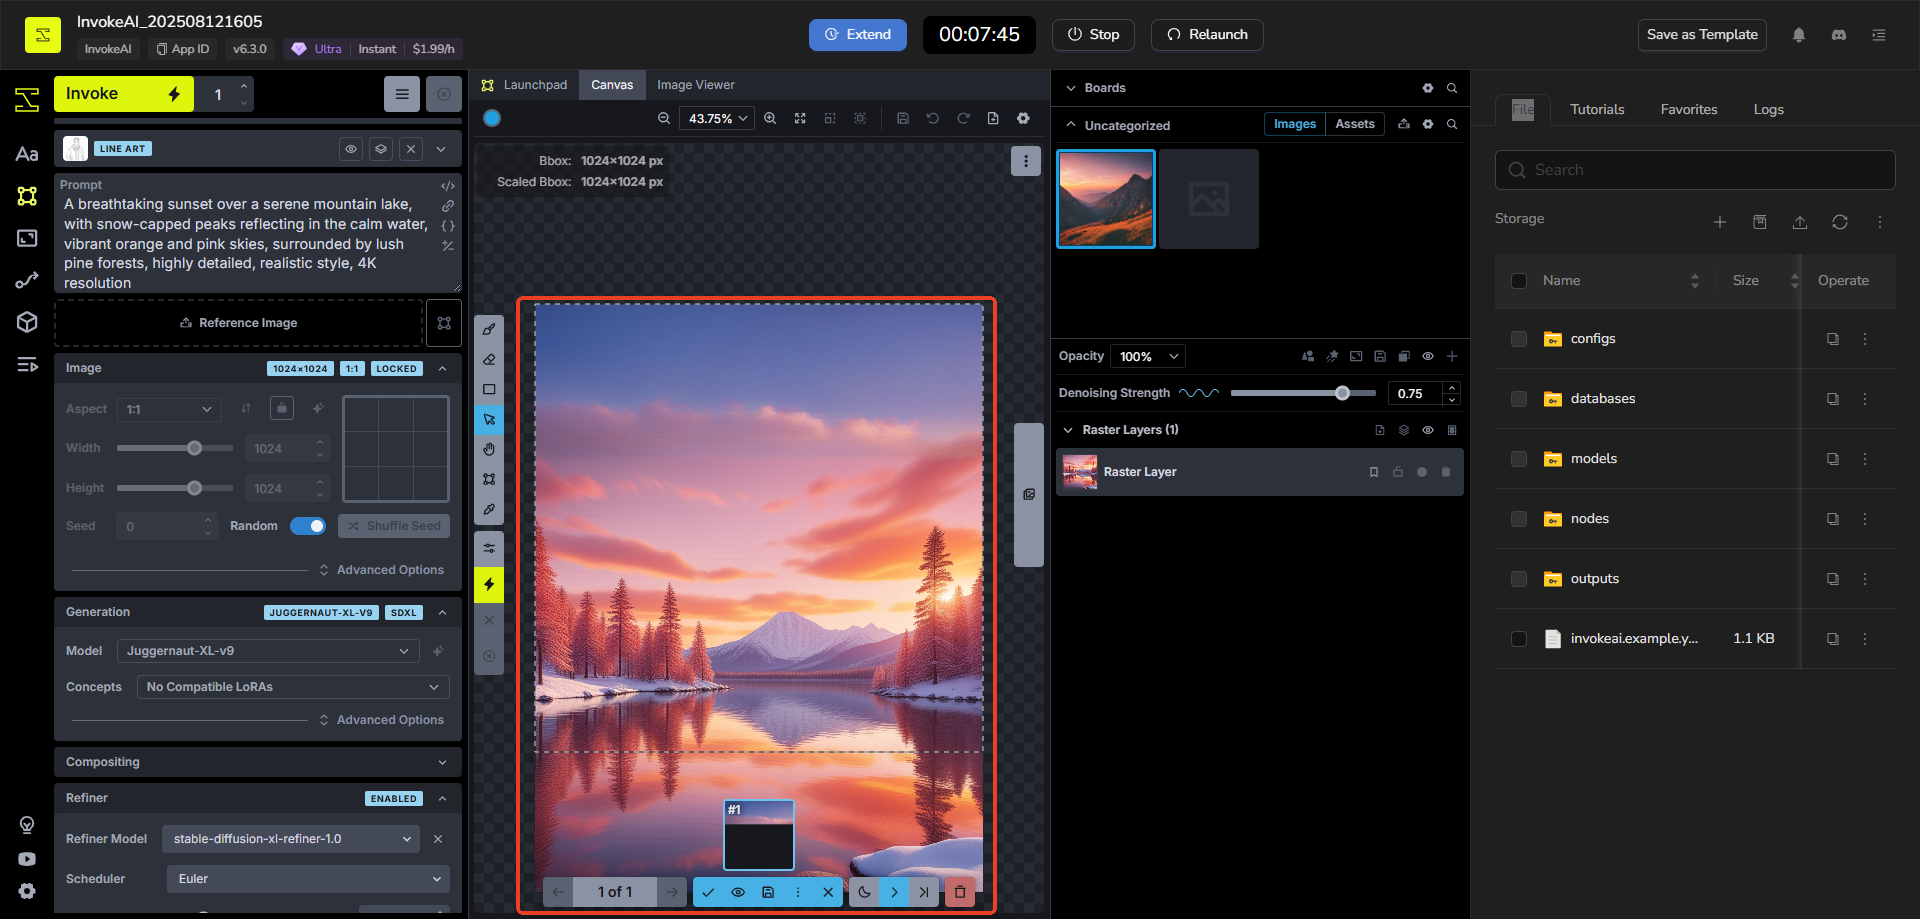
- Drag the bounding box edges to make it bigger (screenshot shows expandable space).
- Click Invoke again—the new empty areas fill (called outpainting), while old content stays.
- Example: If you have an image (like the mountain lake), expand and generate to grow the scene.
- Note: Only works with certain models like Flux or SDXL—switch if needed.
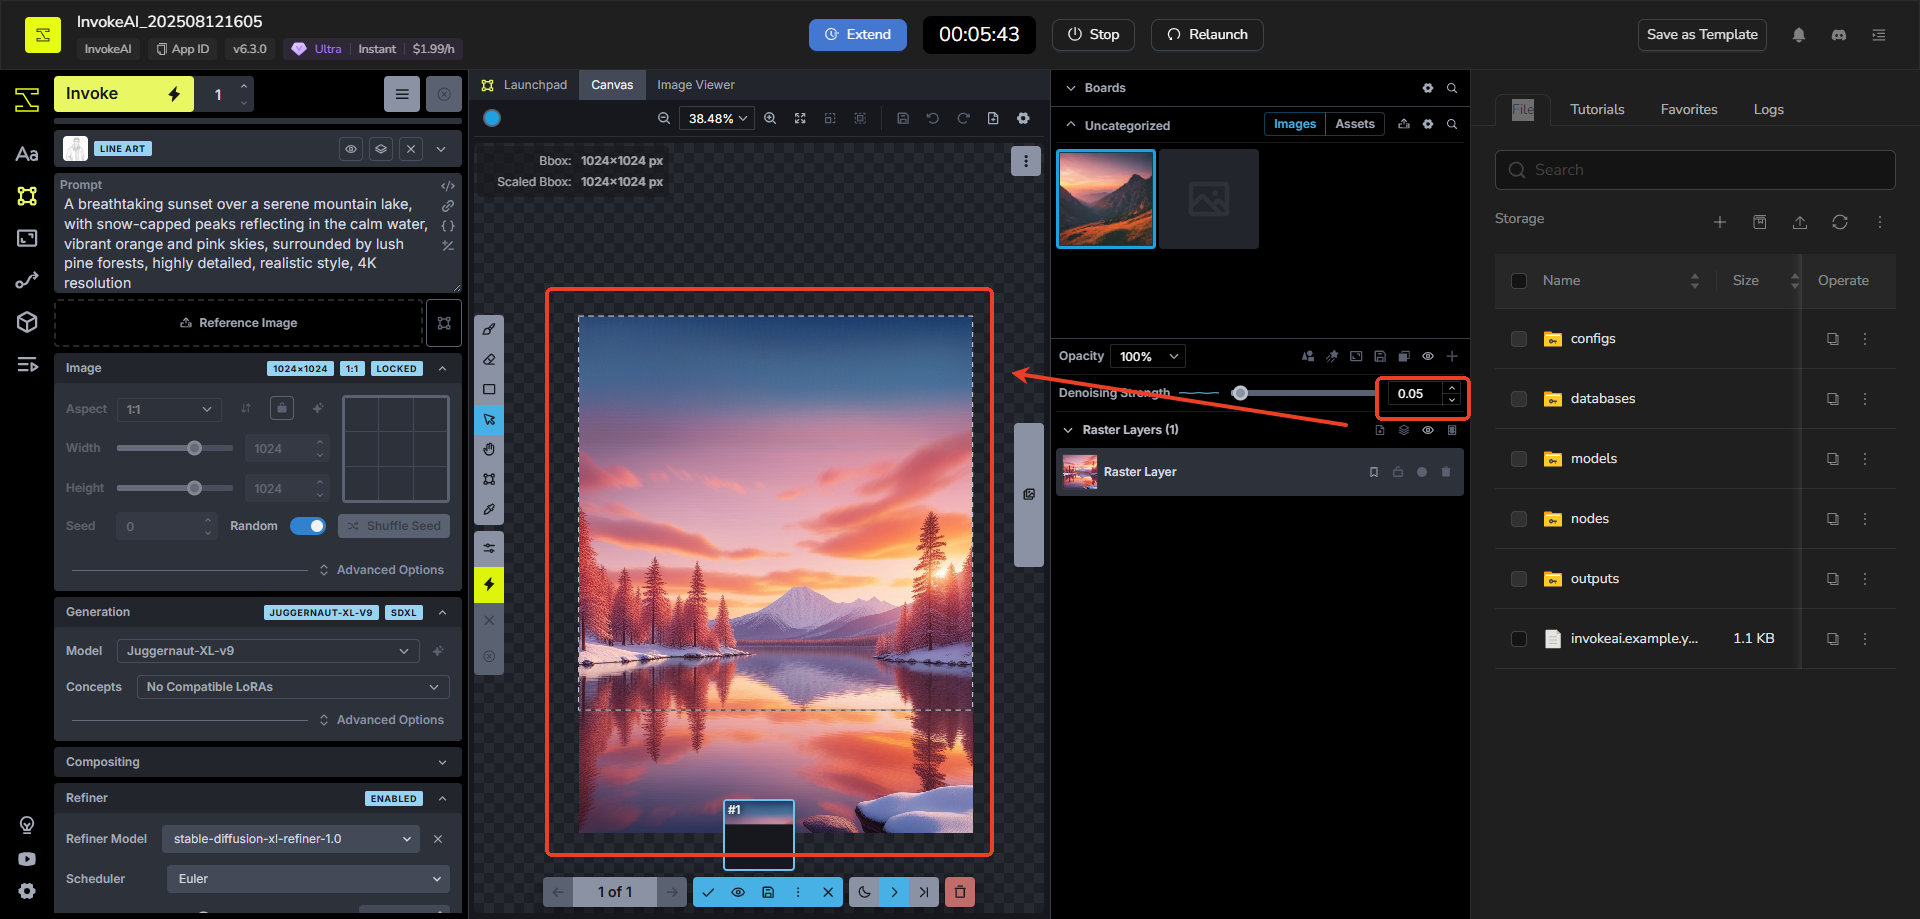
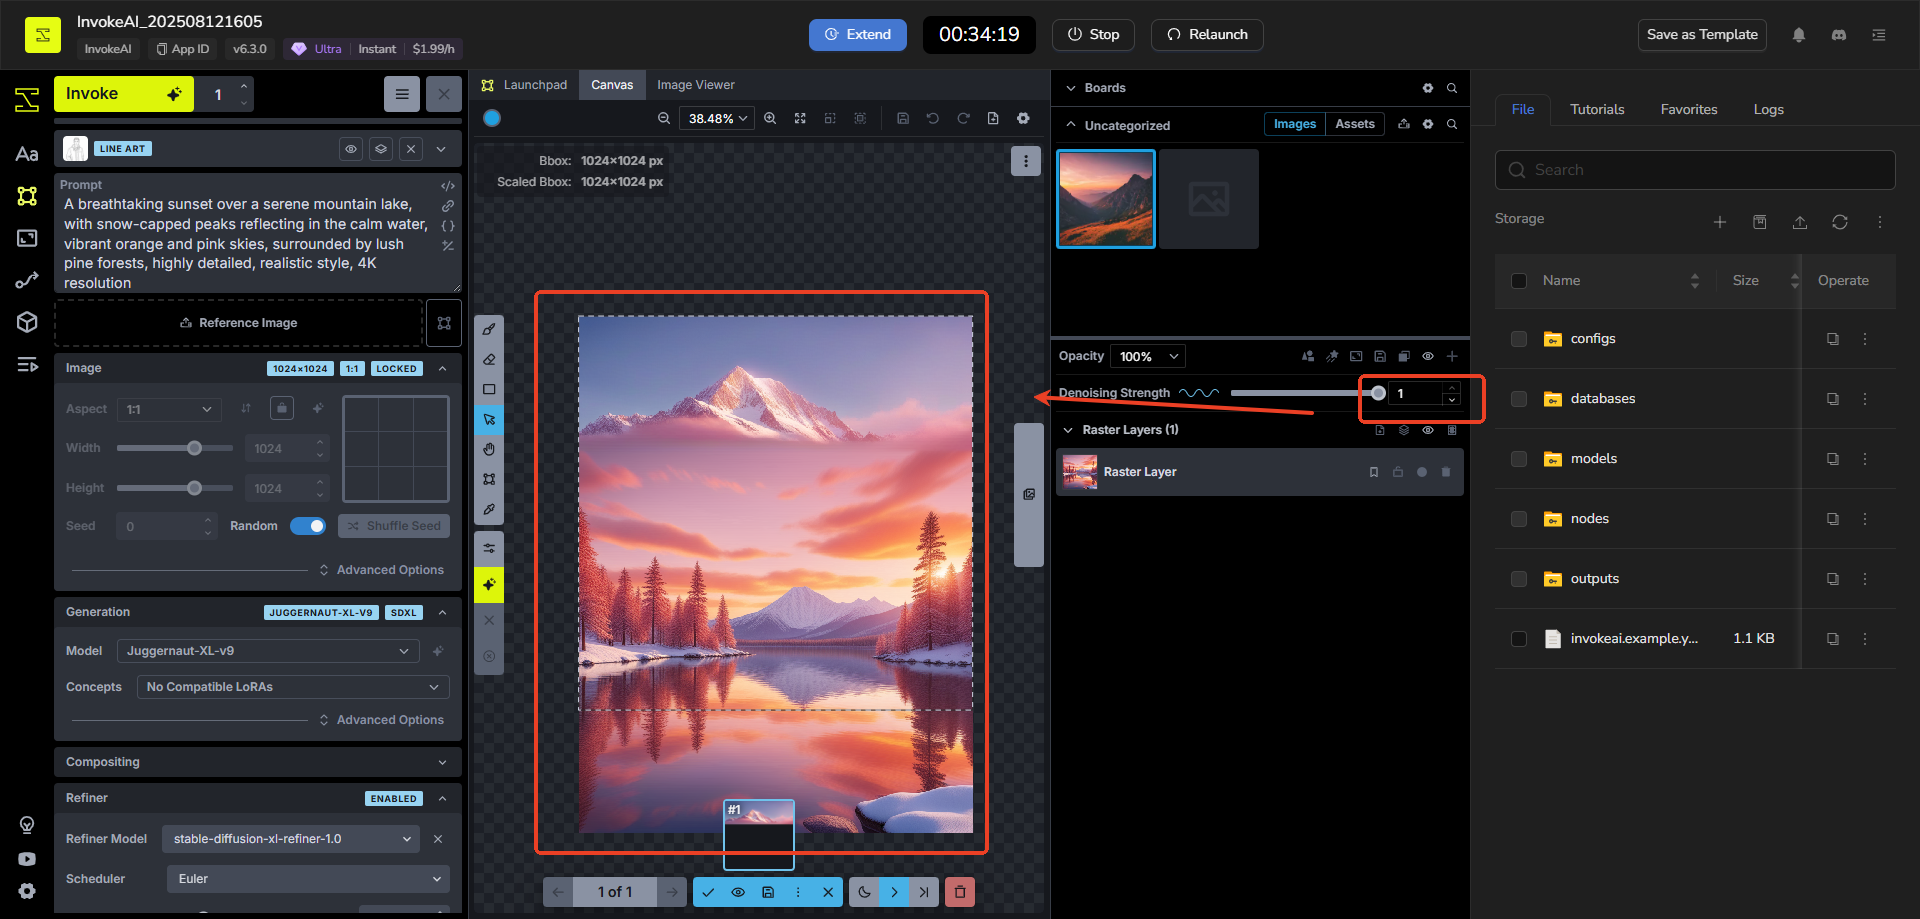
Step 4: Image-to-Image Transformation (When Box Is Full)
- If the bounding box is fully filled (e.g., from an imported image), Invoke uses the visible Raster Layer as a starting point.
- Adjust the Denoising Strength slider in the left panel:
- Low (e.g., 0.2-0.5): Small changes, sticks to original.
- High (e.g., 0.7-1.0): Big transformations.
- This is image-to-image—great for tweaking existing images.
Step 5: Add Control Layers (For Models Like Flux or SDXL)
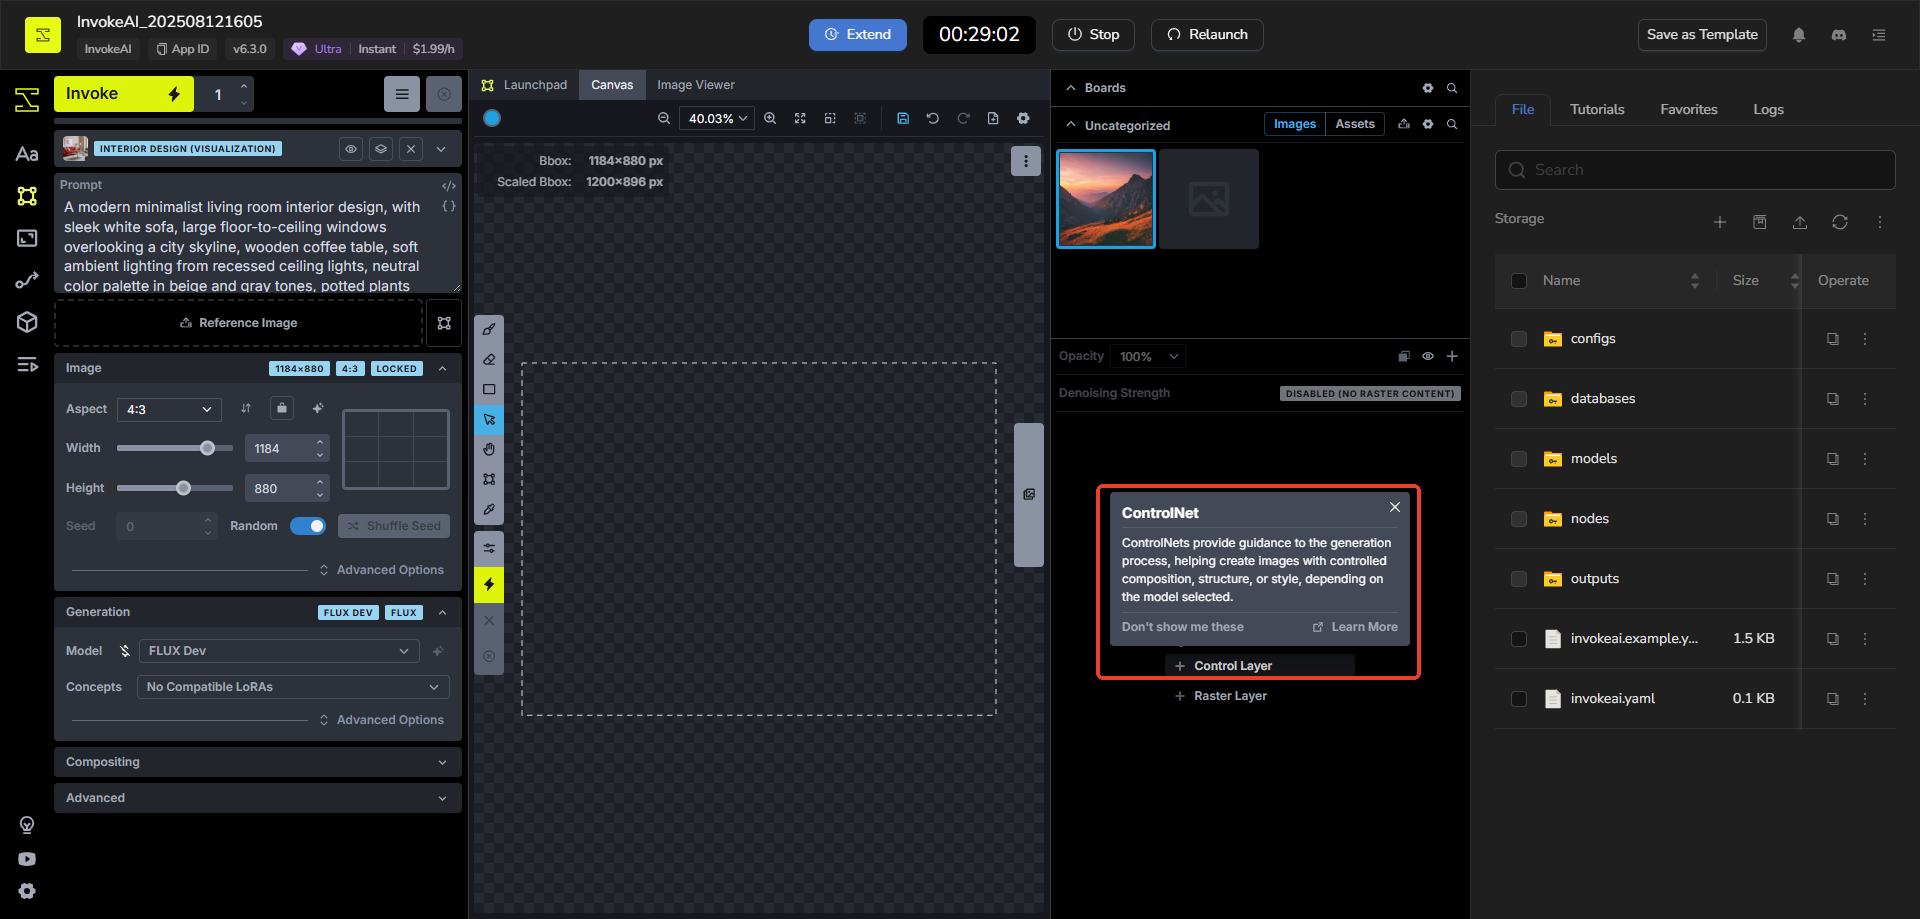
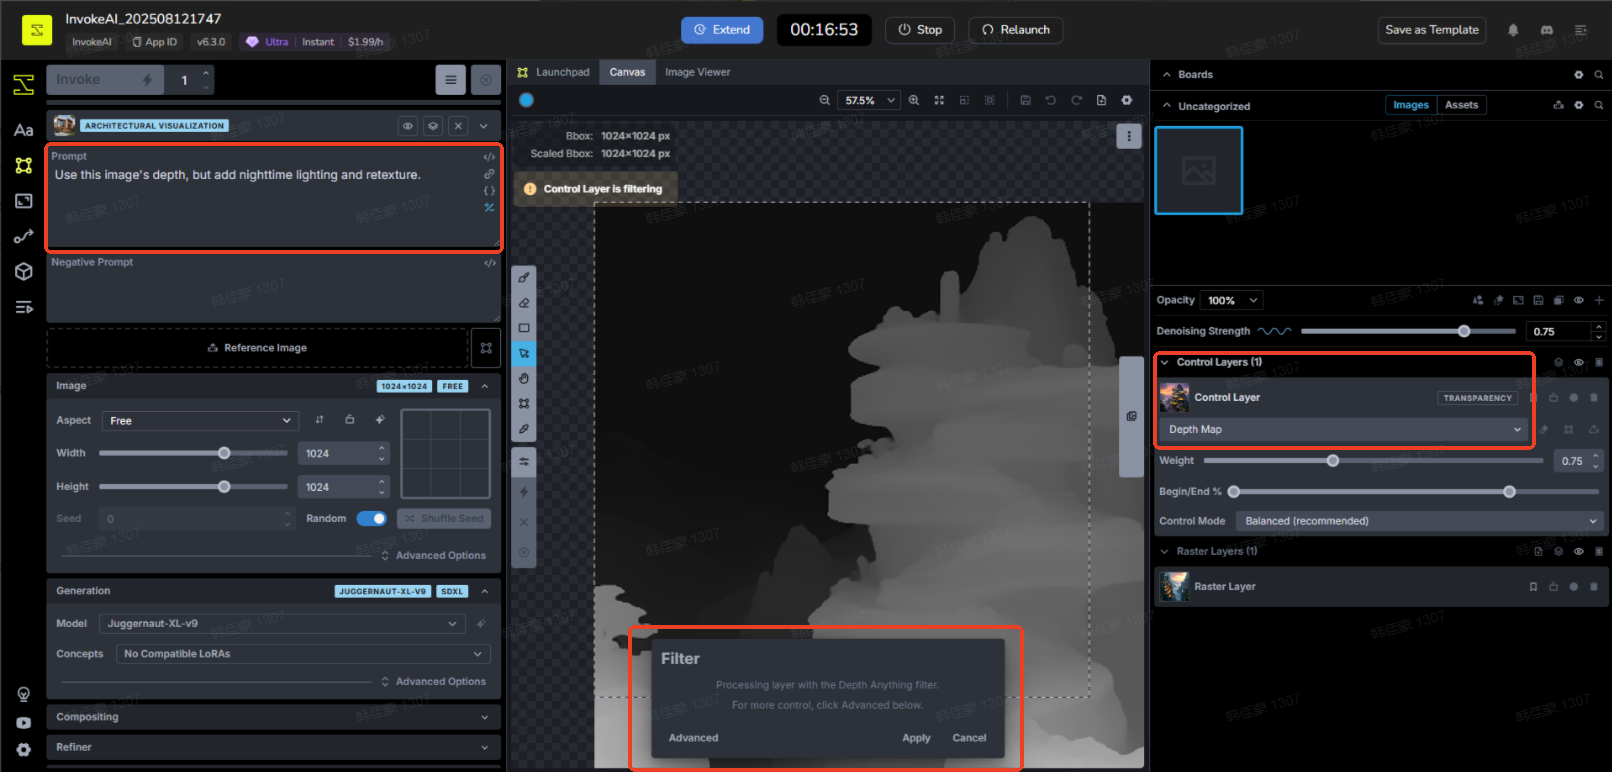
- In the left Layers tab or Control section, add a Control Layer (also called Control Nets).
- Upload a control image to the reference box (use right file manager).
- Pick a type, like:
- Depth Map: Follows depth and space from your image.
- Edge Detection: Keeps outlines and structure.
- Add a prompt, then Invoke. It locks in composition while generating.
- Tip: High precision, but takes practice.
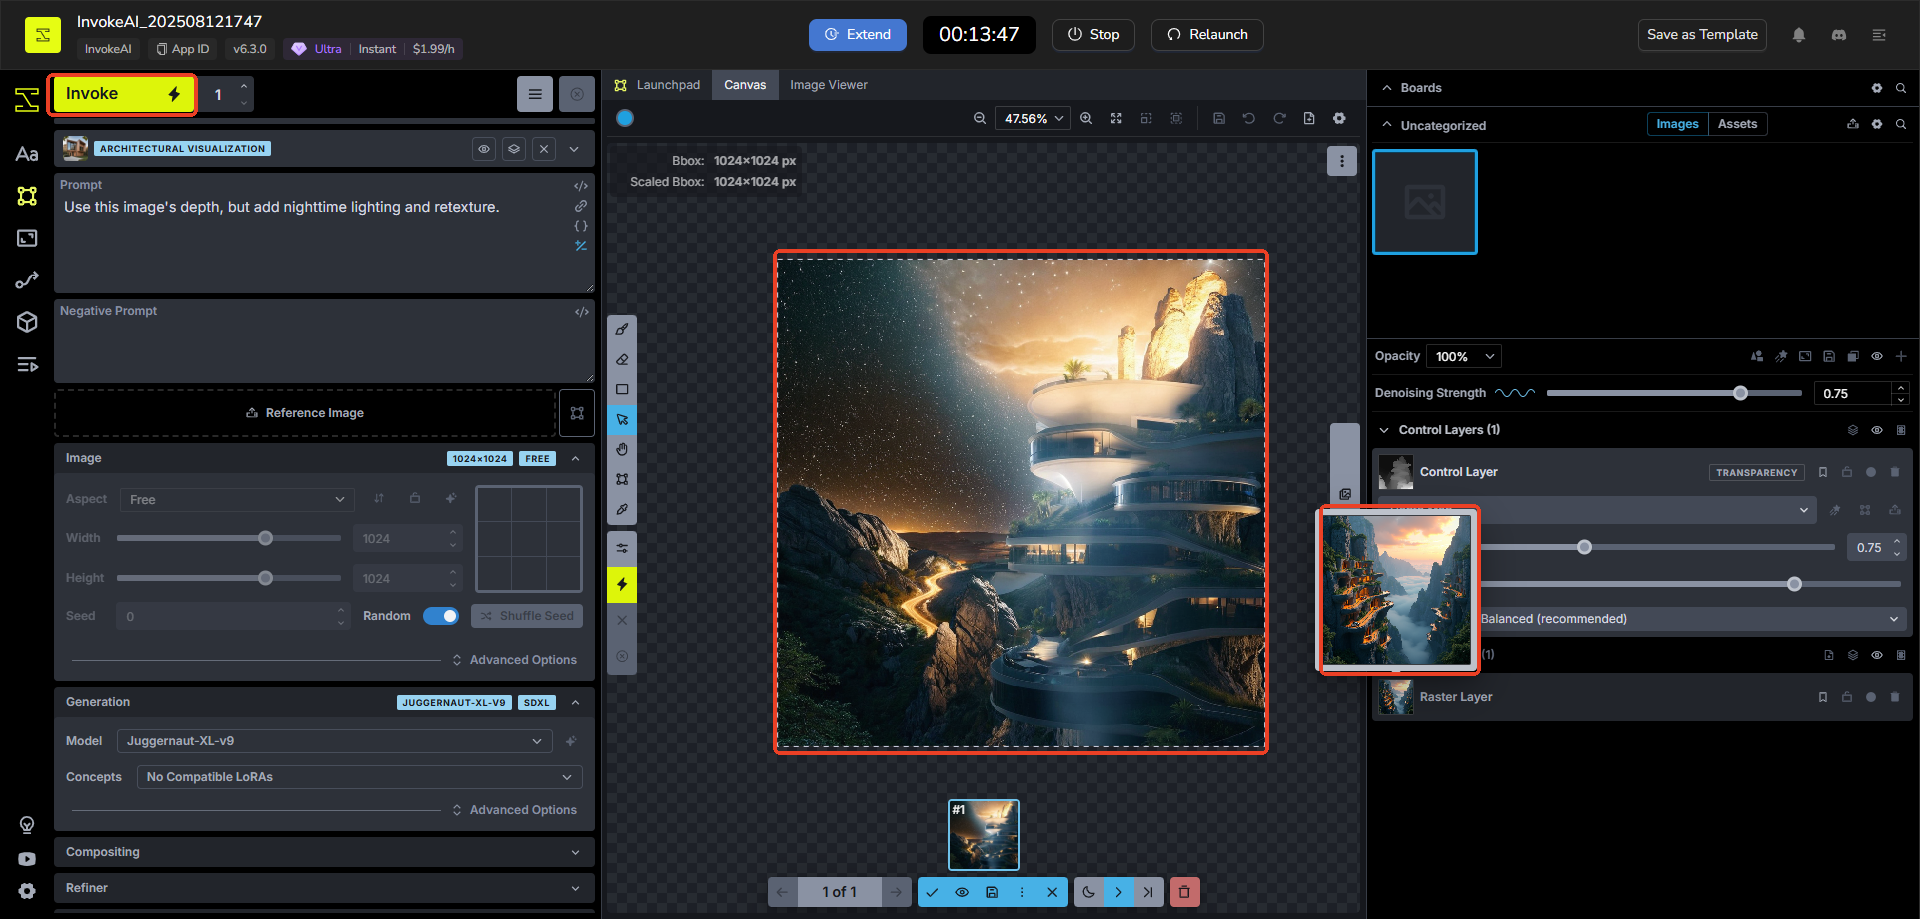
Step 6: Simple Edits with Interpretive Models (Like Flux Context)
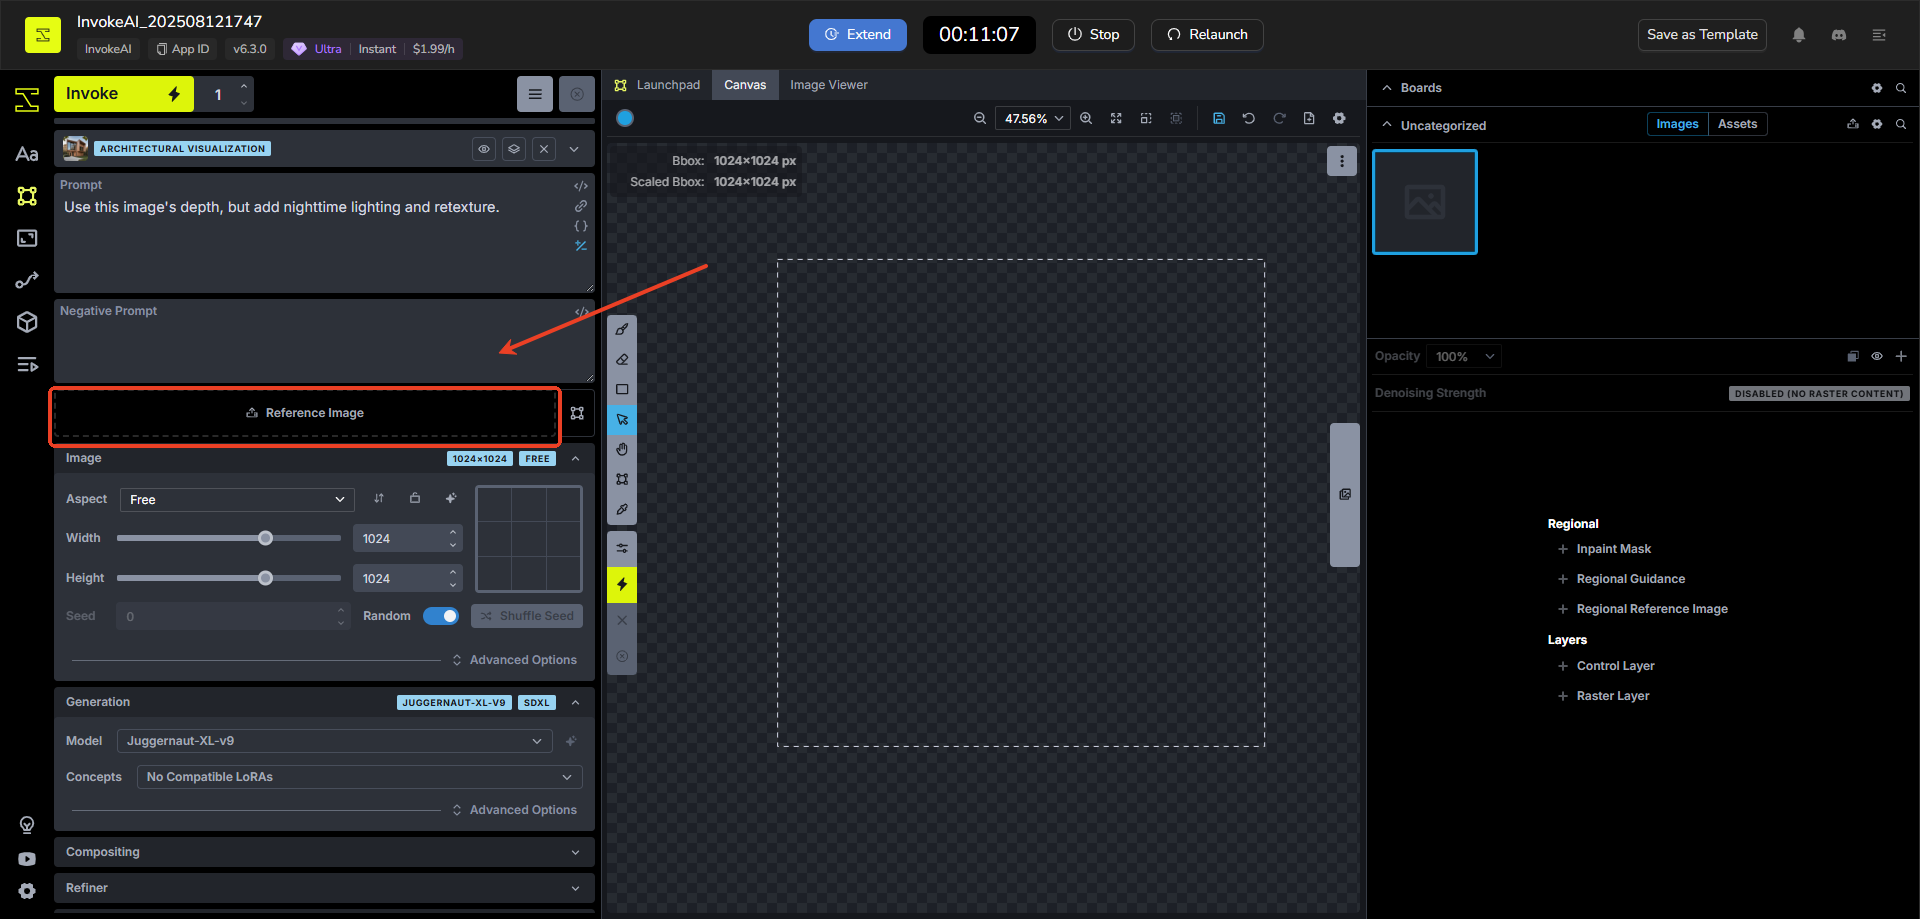
- For quick tweaks, add the image to edit as a Reference Image in the left Image section.
- Describe changes in the prompt, e.g., "Use this image's depth, but add nighttime lighting and retexture."
- Or: "Add a driveway with three luxury cars."
- Click Invoke—the model updates only relevant parts, keeping most intact.
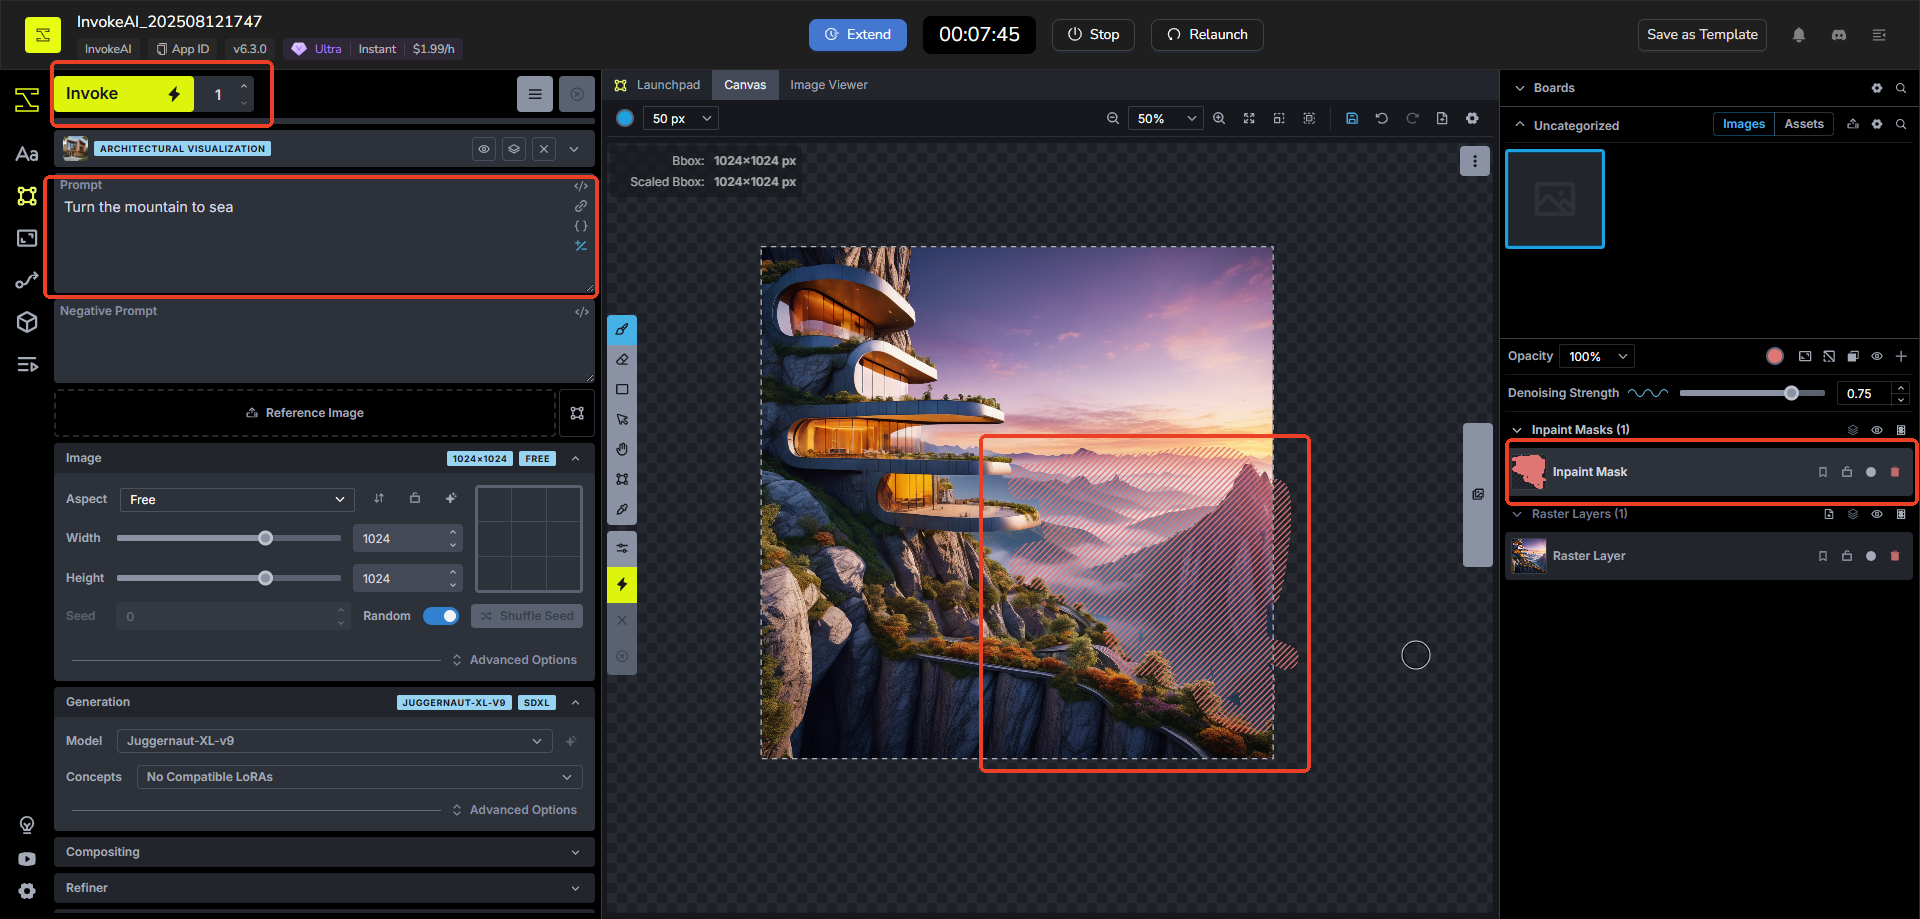
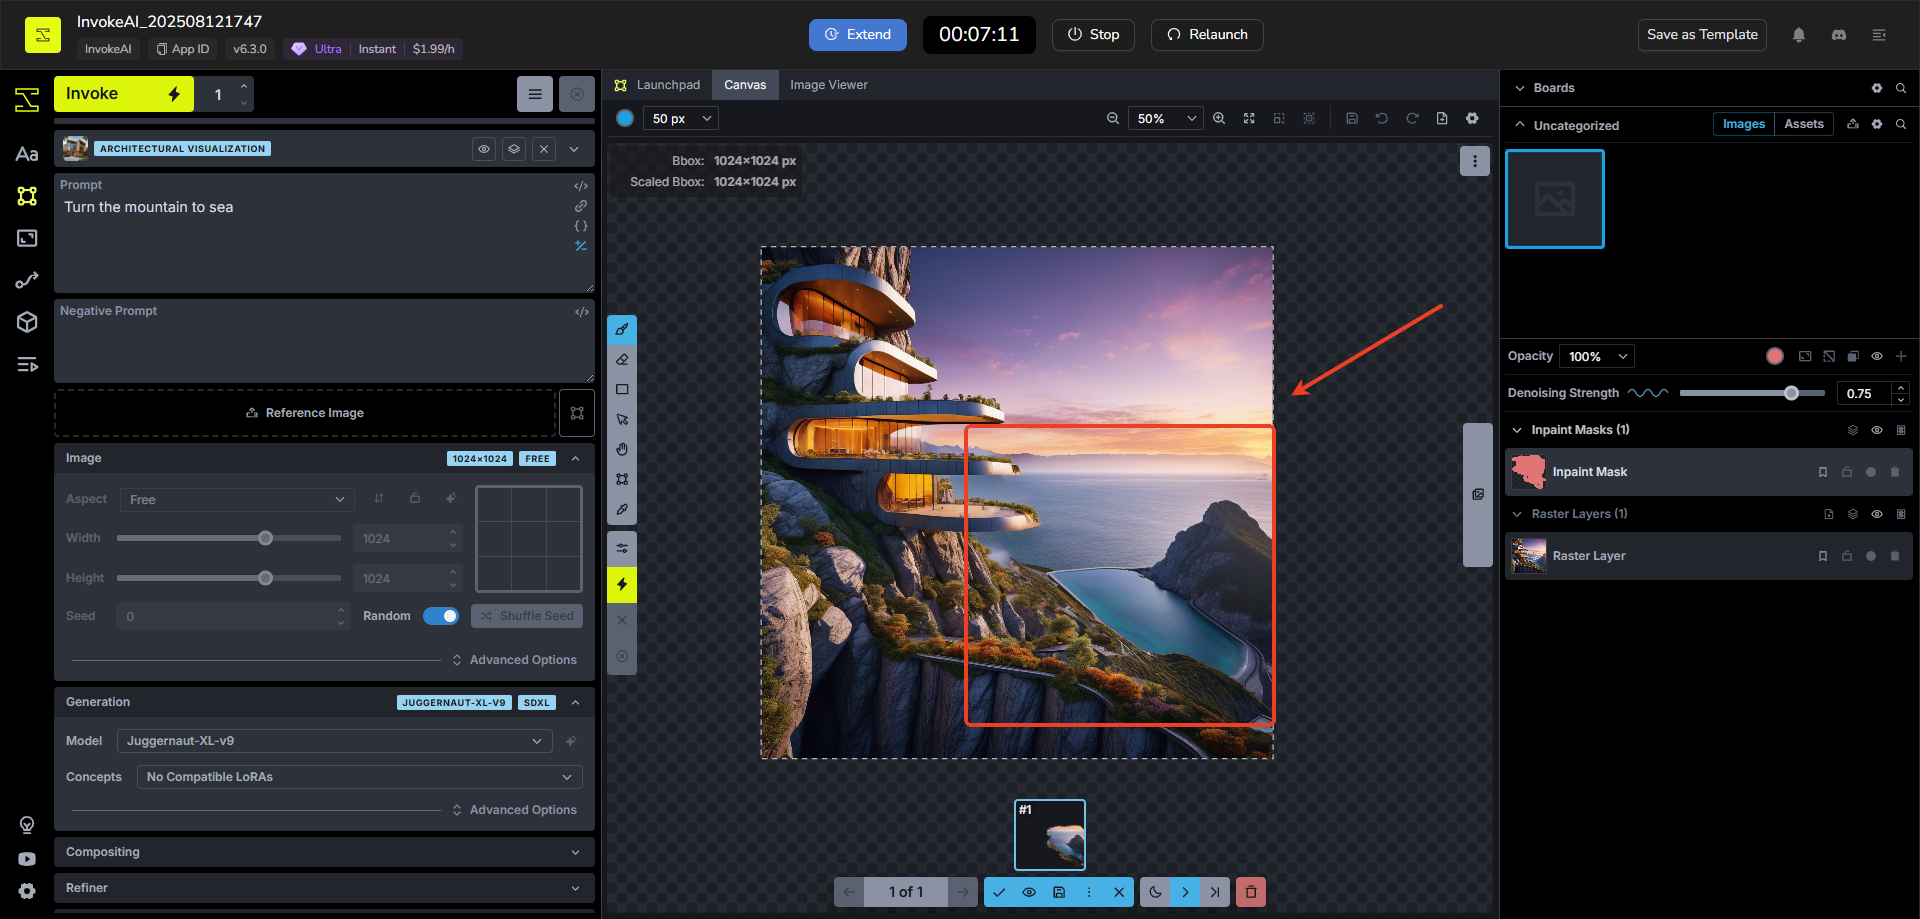
Step 7: Advanced Inpainting (For Models Like Flux or SDXL)
- Switch to an inpainting model (like Flux or SDXL).
- Add an Inpaint Mask Layer in Layers tab, then use the Brush tool to mask the area to change.
- Paint extra guidance on the Raster Layer if needed.
- Adjust Denoising Strength:
- Low: Subtle fixes.
- High: Major changes.
- Add a prompt, then Invoke—it remixes only the masked area.
InvokeAI is designed to be easy to use and customize, making it a perfect tool for both beginners and experts.
Conclusion
Invoke AI stands out as a leading creative engine built to empower professionals across industries with cutting-edge generative AI tools. With its robust features like custom model integration, advanced workflows, and stable diffusion technology, it offers unparalleled flexibility and control over the creative process. Whether you're in entertainment, design, or any creative field, it provides the tools to bring your visions to life.
Ready to explore? Login to MimicPC today and start using InvokeAI to create stunning images with ease!
